淘宝API开发系列---淘宝API的测试及使用2
继续前面一篇随笔《
淘宝API开发系列---淘宝API的测试及使用
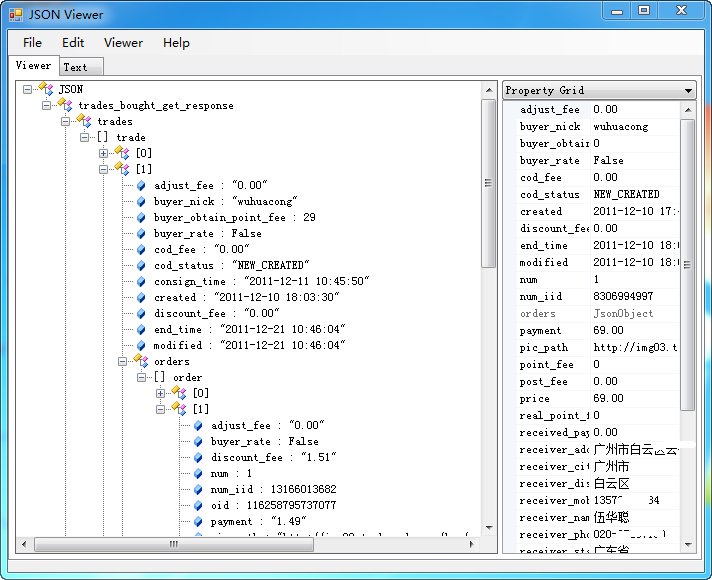
》,来继续介绍淘宝API的具体代码开发部分,上篇主要是介绍淘宝SDK开发的一些流程及必备的信息,以及掌握如何学会利用API文档、淘宝API测试工具来获取我们所需的数据,其中我一般倾向于获取Json数据,然后进行分析,其中Json数据可以通过JsonView工具(
http://jsonviewer.codeplex.com/
)进行格式化显示,方便我们了解和区分各个属性的信息。另外淘宝的SDK里面,封装了很多对象,我们通过数据就可以获取到相关的信息了,不过注意的就是,我们每个接口调用,都要传入Fields的属性,如果我们没有指定相应的属性字段,那么接口返回的数据,就没有这项的,淘宝SDK的对象属性就会为空。

通过以上的工具,我们就能可视化属性的信息了,对接口数据的理解就更加清晰,首先我们来看看我测试例子的运行效果如下所示。

其中上面例子的代码如下所示。
void
TestUserGet()
{
//
单独用户的信息
Console.WriteLine(
"
单独用户的信息
"
);
UserGetRequest req =
new
UserGetRequest();
//
实例化具体API对应的Request类
req.Fields =
"
user_id,nick,created,buyer_credit,type,sex
"
;
req.Nick =
"
wuhuacong
"
;
UserGetResponse rsp = myclient.Execute(req);
//
执行API请求并将该类转换为response对象
Console.WriteLine(rsp.Body);
if
(rsp.User !=
null
)
{
//
Console.WriteLine(rsp.User.Nick);
//
Console.WriteLine(ObjectToString(rsp.User));
List<User> list =
new
List<User>();
list.Add(rsp.User);
this
.winGridView1.DisplayColumns = req.Fields.Replace(
"
_
"
,
""
);
//
对应字段的属性没有“_”字符的
this
.winGridView1.DataSource = list;
}
}
private
void
TestItemGet()
{
//
单独商品的信息
Console.WriteLine(
"
单独商品的信息
"
);
ItemGetRequest req =
new
ItemGetRequest();
req.Fields =
"
num_iid,title,nick,pic_path,cid,price,type,location.city,delist_time,post_fee
"
;
req.NumIid =
3838293428L
;
ItemGetResponse itemRsp = myclient.Execute(req);
if
(itemRsp !=
null
&& itemRsp.Item !=
null
)
{
//
Console.WriteLine(itemRsp.Item.Nick);
//
Console.WriteLine(ObjectToString(itemRsp.Item));
List<Item> list =
new
List<Item>();
list.Add(itemRsp.Item);
this
.winGridView1.DisplayColumns = req.Fields.Replace(
"
_
"
,
""
);
//
对应字段的属性没有“_”字符的
this
.winGridView1.DataSource = list;
}
}
private
void
TestItemSearch()
{
//
查询商品信息(不含类别)
Console.WriteLine(
"
查询商品信息(不含类别)
"
);
ItemsGetRequest req =
new
ItemsGetRequest();
req.Fields =
"
num_iid,title,nick,pic_url,cid,price,type,delist_time,post_fee,score,volume
"
;
//
,location.city,location.state";
req.Q =
"
笔记本
"
;
//
itemReq.Cid = "14";
req.OrderBy =
"
volume:desc
"
;
req.PageNo =
1
;
req.PageSize =
40
;
//
显示列表信息
ItemsGetResponse itemRsp = myclient.Execute(req);
if
(itemRsp !=
null
)
{
//
Console.WriteLine(itemRsp.TotalResults);
//
foreach (Item item in itemRsp.Items)
//
{
//
Console.WriteLine(ObjectToString(item));
//
}
this
.winGridView1.DisplayColumns = req.Fields.Replace(
"
_
"
,
""
);
//
对应字段的属性没有“_”字符的
this
.winGridView1.DataSource = itemRsp.Items;
}
}
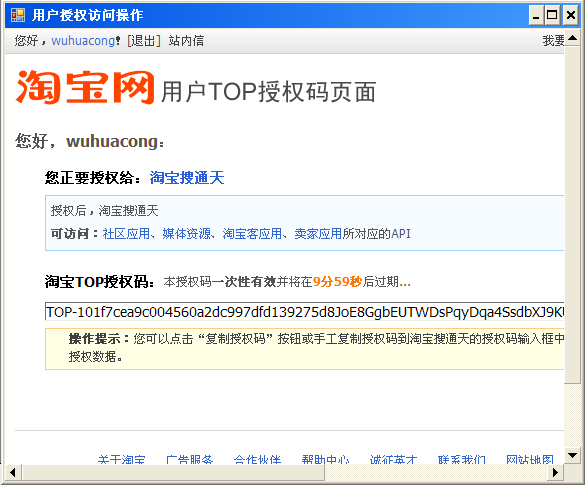
对于需要获取用户私密信息,如买入卖出等重要信息,还需要获取用户的SessionKey的,我们可以通过下面接口函数,弹出登录窗口,然后登录后,定位到对应的App应用页面,然后页面加载的时候,获取到对应的SessionKey、


<summary>
///
判断是否顺利获取SessionKey
///
</summary>
///
<returns></returns>
private
string
GetAuthorizeCode(
string
appKey)
{
string
authorizeCode =
""
;
FrmAuthorized dlg =
new
FrmAuthorized();
dlg.AppKey = appkey;
if
(dlg.ShowDialog() == DialogResult.OK)
{
authorizeCode = dlg.AuthrizeCode;
}
if
(
string
.IsNullOrEmpty(authorizeCode))
return
null
;
string
sessionKeyUrl =
string
.Format(TOP_AUTH_URL, authorizeCode);
HttpHelper helper =
new
HttpHelper();
string
html = helper.GetHtml(sessionKeyUrl);
//
格式
//
top_appkey=1142&top_parameters=xxx&top_session=xxx&top_sign=xxx&encode=utf-8
string
reg =
"
.*?&top_session=(?<session>.*?)&top_sign
"
;
string
sessionKey = CRegex.GetText(html, reg,
1
);
return
sessionKey;
}
最后我们看看其中获取已买记录的接口实现如下所示。
void
TestBuyInfo()
{
if
(
string
.IsNullOrEmpty(sessionKey))
{
sessionKey = GetAuthorizeCode(
this
.appkey);
}
//
买入交易
Console.WriteLine(
"
买入交易
"
);
TradesBoughtGetRequest req =
new
TradesBoughtGetRequest();
//
req.Fields = "tid,title,price,type,num_iid,seller_nick,buyer_nick,status";
req.Fields =
"
tid,title,price,type,num_iid,seller_nick,buyer_nick,status,receiver_state,receiver_city,receiver_district,receiver_address
"
;
req.PageNo =
1L
;
req.PageSize =
40L
;
TradesBoughtGetResponse rsp = myclient.Execute(req, sessionKey);
if
(rsp !=
null
)
{
//
Console.WriteLine(rsp.Trades.Count);
//
if (rsp.Trades.Count > 0)
//
{
//
foreach (Trade item in rsp.Trades)
//
{
//
Console.WriteLine(ObjectToString(item));
//
}
//
}
this
.winGridView1.DisplayColumns = req.Fields.Replace(
"
_
"
,
""
);
//
对应字段的属性没有“_”字符的
this
.winGridView1.DataSource = rsp.Trades;
}
}
以上利用了我的Winform分页控件进行数据展示,因此代码要简化一些,当然,也可以用DataGridView来进行数据显示,不过代码方面可能要多一些。


