# Example MySQL config file for small systems.

#

# This is for a system with little memory (<=64M) where MySQL is only used

# from time to time and it's important that the mysqld daemon

# doesn't use much resources.

#

# You can copy this file to

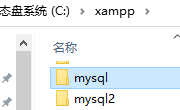
# C:/xampp/mysql/bin/my.cnf to set global options,# mysql-data-dir/my.cnf to set server-specific options (in this

# installation this directory is C:/xampp/mysql/data) or

# ~/.my.cnf to set user-specific options.

#

# In this file,you can use all long options that a program supports.

# If you want to know which options a program supports,run the program

# with the"--help"option.


# The following options will be passed to all MySQL clients[client]# password=your_password

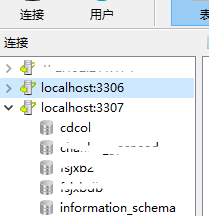
port= 3307socket= "C:/xampp/mysql2/mysql.sock"# Here follows entries for some specific programs


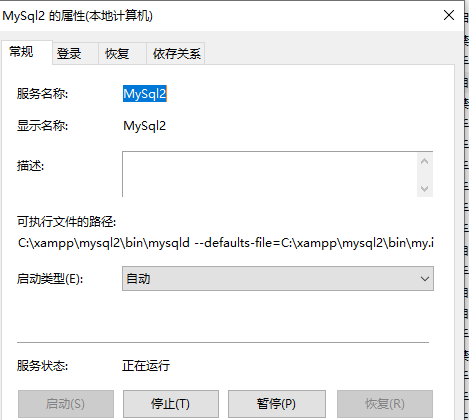
# The MySQL server[mysqld]port= 3307socket= "C:/xampp/mysql2/mysql.sock"basedir= "C:/xampp/mysql2"tmpdir= "C:/xampp/tmp"datadir= "C:/xampp/mysql2/data"pid_file= "mysql.pid"# enable-named-pipe

key_buffer=16M

max_allowed_packet=1M

sort_buffer_size=512K

net_buffer_length=8K

read_buffer_size=256K

read_rnd_buffer_size=512K

myisam_sort_buffer_size=8M

log_error= "mysql_error.log"# Change here for bind listening

# bind-address="127.0.0.1"# bind-address= ::1# for ipv6


# Where do all the plugins live

plugin_dir= "C:/xampp/mysql2/lib/plugin/"# Don't listen on a TCP/IP port at all. This can be a security enhancement,# if all processes that need to connect to mysqld run on the same host.

# All interaction with mysqld must be made via Unix sockets or named pipes.

# Note that using this option without enabling named pipes on Windows

# (via the"enable-named-pipe"option) will render mysqld useless!

#

# commented in by lampp security

#skip-networking

skip-federated


# Replication Master Server (default)

# binary logging is required for replication

# log-bin deactivated by default since XAMPP1.4.11#log-bin=mysql-bin


# required unique id between1 and 2^32 - 1# defaults to1if master-host is not set

# but will not function as a master if omitted

server-id= 1# Replication Slave (comment out master section to use this)

#

# To configure this host as a replication slave,you can choose between

# two methods :

#

#1) Use the CHANGE MASTER TO command (fully described in our manual) -

#    the syntax is:

#

#    CHANGE MASTER TO MASTER_HOST=<host>, MASTER_PORT=<port>,#    MASTER_USER=<user>, MASTER_PASSWORD=<password> ;#

#    where you replace <host>, <user>,<password> by quoted strings and

#    <port> by the master's port number (3306by default).

#

#    Example:

#

#    CHANGE MASTER TO MASTER_HOST='125.564.12.1', MASTER_PORT=3306,#    MASTER_USER='joe', MASTER_PASSWORD='secret';#

# OR

#

#2) Set the variables below. However, in case you choose this method,then

#    start replication for the first time (even unsuccessfully,for example

#    if you mistyped the password in master-password and the slave fails to

#    connect), the slave will create a master.info file,and any later

#    change in this file to the variables' values below will be ignored and

#    overridden by the content of the master.info file,unless you shutdown

#    the slave server,delete master.info and restart the slaver server.

#    For that reason,you may want to leave the lines below untouched

#    (commented) and instead use CHANGE MASTER TO (see above)

#

# required unique id between2 and 2^32 - 1# (and different from the master)

# defaults to2if master-host is set

# but will not function as a slave if omitted

#server-id= 2#

# The replication master for this slave - required

#master-host=<hostname>

#

# The username the slave will use for authentication when connecting

# to the master - required

#master-user=<username>

#

# The password the slave will authenticate with when connecting to

# the master - required

#master-password=<password>

#

# The port the master is listening on.

# optional - defaults to3306#master-port=<port>

#

# binary logging - not required for slaves,but recommended

#log-bin=mysql-bin


# Point the following paths to different dedicated disks

#tmpdir= "C:/xampp/tmp"#log-update=/path-to-dedicated-directory/hostname


# Uncomment the following if you are using BDB tables

#bdb_cache_size=4M

#bdb_max_lock= 10000# Comment the following if you are using InnoDB tables

#skip-innodb

innodb_data_home_dir= "C:/xampp/mysql2/data"innodb_data_file_path=ibdata1:10M:autoextend

innodb_log_group_home_dir= "C:/xampp/mysql2/data"#innodb_log_arch_dir= "C:/xampp/mysql/data"## You can set .._buffer_pool_size up to50 - 80%

## of RAM but beware of setting memory usage too high

innodb_buffer_pool_size=16M

innodb_additional_mem_pool_size=2M

## Set .._log_file_size to25% of buffer pool size

innodb_log_file_size=5M

innodb_log_buffer_size=8M

innodb_flush_log_at_trx_commit= 1innodb_lock_wait_timeout= 50## UTF8Settings

#init-connect=\'SET NAMES utf8\'

#collation_server=utf8_unicode_ci

#character_set_server=utf8

#skip-character-set-client-handshake

#character_sets-dir="C:/xampp/mysql/share/charsets"

[mysqldump]quick

max_allowed_packet=16M[mysql]no-auto-rehash

# Remove the next comment character if you are not familiar with SQL

#safe-updates[isamchk]key_buffer=20M

sort_buffer_size=20M

read_buffer=2M

write_buffer=2M[myisamchk]key_buffer=20M

sort_buffer_size=20M

read_buffer=2M

write_buffer=2M[mysqlhotcopy]interactive-timeout


