2023年4月


  • 论文名称:context-aware learning of hierarchies of low-fidelity models for multi-fidelity uncertainty quantification
  • 链接:
    https://www.sciencedirect.com/science/article/pii/S0045782523000312
  • 国际计算力学领域的顶级期刊《Computer Methods in Applied Mechanics and Engineering》(中科院一区 TOP,IF:6.756)

0 abstract

  • 背景:


    • multi-fidelity Monte Carlo 方法利用 low-fidelity and surrogate models 来减少方差(variance),使不确定性量化变得可行,尽管物理系统的 high-fidelity 数值模拟计算成本很高。
  • 工作简述:


    • 我们提出了一种 context-aware 的 multi-fidelity Monte Carlo 方法,实现了训练 low-fidelity 模型的成本和 Monte Carlo 采样的成本之间的最佳平衡。

    • 当训练 low-fidelity 模型时,我们考虑到了所学的 low-fidelity 模型将被使用的背景,即在 Monte Carlo 估计中减少方差,这使得它能够在训练和抽样之间找到最佳的权衡,以最小化给定计算预算(computational budget)下估计器的均方误差(mean-squared error)上限。

  • 继承了之前的工作:


    • 它将以前开发的 context-aware bi-fidelity Monte Carlo 方法,推广到多个模型的层次结构 和 更普遍的 low-fidelity 模型类型,如 sparse-grid(比如说 PDE 仿真的网格粒度粗一点)和 deep-network。
  • 文献树上的位置:


    • 我们与传统的 surrogate modeling 和 model reduction 技术不一样,后者构建 low-fidelity 模型的主要目的是为了很好地接近 high-fidelity 模型的输出,通常忽略了所学模型在 upstream tasks 中的 context。
  • 实验结果:


    • 用陀螺动力学模拟代码 Gene 进行的数值实验表明,在做一个不确定性量化时,与 single-fidelity Monte Carlo 和 standard multi-fidelity estimators 相比,速度提高了两个数量级:相当于在德州高级计算中心 Lonestar6 超级计算机的一个节点上,运行时间从 72 天减少到 4 小时。
  • literature:[1] 是一个 Multi-Fidelity 的 survey。其他 literature 懒得整理了。
  • motivation:如果没有现成的 low-fidelity model,那么就需要首先训练得到它们,这可能会产生额外的计算成本,并且需要对 high-fidelity model 进行额外的评估,以产生训练数据。
  • main idea:该方法将 ① 训练多个 low-fidelity 模型的层次的成本 ② 蒙特卡洛采样以获得多保真估计器的成本进行 trade-off,在给定的 computational budget 下,使均方误差(mean-squared error)的上限最小(context-aware:最大限度地减少蒙特卡罗估计的方差),而不是尽可能接近 high-fidelity model。
  • structure:
    • 2:preliminaries,介绍符号定义,传统的 multi-fidelity Monte Carlo 算法,他们之前做的一个 bi-fidelity context-aware 算法。
    • 3:method。
    • 4:两个 experiment,1 具有九个不确定参数的二维空间域上的热传导问题,2 具有不确定输入的现实等离子体微扰动情况。数值结果的代码:
      https://github.com/ionutfarcas/context-aware-mfmc

2 背景 & 前情提要

2.1 背景:static multi-fidelity Monte Carlo estimation

  • \(f^{(0)}:X→Y\)
    是一个输入-输出响应(input-output response),expensive to evaluate。输入为 d 维,输出为 1 维。
    • 对一个随机变量 Θ=[Θ1,Θ2,...,Θd]^T,我们想估计 f^(0)(Θ) 的期望值 μ0。
  • MFMC(multi-fidelity Monte Carlo)estimator 包含 k+1 个模型,f^(0) high-fidelity,f^(1) ... f^(k) low-fidelity。
    • low-fidelity model 的精度 ρ:用 f^(j) 对 f^(0) 的 Pearson correlation coefficient 来定义:
      \(\rho_j = Cov[f^{(0)}, f^{(j)}]/σ_0σ_j\)
      ,其中 σ 是方差(variance)。设定 ρ_k+1 = 0。
    • models 的评估成本:w1, w2, ..., wk>0。归一化 high-fidelity f^(0) 的评估成本 w0 = 1。
    • 假设模型们满足排序:精度:1 = |ρ0|>|ρ1|>…>|ρk|;评估成本:
      \(w_{j-1}/w_{j}\gt[ρ^2_{j-1}-ρ^2_j]/[ρ^2_{j}-ρ^2_{j+1}]\)
  • 设 m_j 为 model f^(j) 的评估次数,0 ≤ m0 ≤ m1 ≤ … ≤ m_k。每一次评估都从独立同分布(iid)的分布
    \(\pi\)
    里抽样。
  • 于是 MFMC estimator 形式:
    \(\hat E^{MFMC} = \hat E_{m_0}^{(0)}+\sum_{j=1}^k\alpha_j(\hat E_{m_j}^{(j)}-\hat E_{m_{j-1}}^{(j)})\)
    ,其中 $\hat E_{m_j}^{(j)}=\frac 1 {m_0}f^{(0)}(\boldsymbol\theta_i) $ 即 f(θ) 的均值。
  • 总 computational cost:
    \(p=\sum_{j=0}^km_jw_j\)
  • 我们把 p 固定(budget),去找最优的
    \(m_0^*, \cdots, m_k^*\)
    以及
    \(\alpha_0^*, \cdots, \alpha_k^*\)
    ,来让
    \(\hat E^{MFMC}\)
    的方差最小。
    • \(\hat E^{MFMC}\)
      的 MSE =
      \(\frac {\sigma_0^2}p\bigg(\sum_{j=0}^k\sqrt{w_j(\rho_j^2-\rho_{j+1}^2)}\bigg)^2\)
    • 其实是有闭式解的,见 [14]。

2.2 前情提要:context-aware bi-fidelity Monte Carlo estimator

  • 他们之前做的 context-aware bi-fidelity MC estimator 的工作是 [2]。


    • 改了一下 notation: low-fidelity model
      \(f_n^{(1)}\)
      表示训 f^(1) 需要用 high-fidelity f^(0) 的 n 个样本。
    • 假设所有 low-fidelity model 都是用相同的 NN 来训,唯一不同的是训练样本数量,那么 Pearson 系数 ρ1 和评估成本 w1 都取决于 n。
    • 【这是假设 assumption】Pearson 系数的 bound:
      \(1-\rho_1^2(n)\le c_1n^{-\alpha}\)
      ;评估成本的 bound:
      \(w_1(n)\le c_2n^\beta\)
      ;其中 c1 c2 α>0 β>0 都是常数。
  • 我们的 budget 是 p。如果用 n 个样本训练 f^(1),那么还有 p-n 的预算用于 f^(1) 的评估。

  • context-aware bi-fidelity MC estimator:
    \(\hat E_n^{CA-MFMC}=\hat E_{m_0^*}^{(0)}+\alpha_1^*(E_{m_1^*}^{(1)}-E_{m_0^*}^{(1)})\)
    ,决策变量为
    \(m_0^*, m_1^*, α_1^*\)
    ,目标函数为最小化
    \(\hat E_n^{CA-MFMC}\)
    的 MSE。


    • \(\hat E_n^{\rm CA-MFMC}\)
      的 MSE =
      \(\frac{\sigma_0^2}{p-n}\bigg(\sqrt{1-\rho_1^2(n)}+\sqrt{w_1(n)\rho_1^2(n)}\bigg)^2\)
      (公式 2.6)。
  • 如果预算 p 是固定的,n 可以通过最小化 MSE 的上界来选择。


    • 上界:
      \(\rm {MSE}(\hat E_n^{CA-MFMC})\le\frac{2\sigma_0^2}{p-n}(c_1n^{-\alpha}+c_2n^\beta)\)
    • 工作 [2] 表明,在某些假设下,给定一个 p,存在一个唯一的 n∗,最小化(2.6);然而,n∗ 没有闭式解,只能数值寻找。
    • 最佳的 n∗ 是独立于预算 p 的。

3 method

3.1 一些关于 multi-fidelity models 的假设

  • 假设 1:存在
    \(c_{a,j}\ge0\)
    ,函数
    \(r_{a,j}(n_j)\)
    值为正数、对 n_j 单调递减、二次可微。限制精度(Pearson 系数):
    \(1-ρ_j^2(n_j)\le c_{a,j}r_{a,j}(n_j)\)
  • 假设 2:存在
    \(c_{c,j}\ge0\)
    ,函数
    \(r_{c,j}(n_j)\)
    值为正数、对 n_j 单调递增、二次可微。限制评估成本:
    \(w_j(n_j)\le c_{c,j}r_{c,j}(n_j)\)
  • 貌似,假设两个 r 函数为:
    \(r_{a,j}=n^{-\alpha},r_{c,j}=n^\alpha,\alpha\gt0\)
  • 一个备注:事实上,如果一组数据拿去训 f^(i),那么也有可能可以拿去训 f^(j);不过,更有可能的一种情况是,两个模型结构不一样,需要的训练数据结构也不一样,所以不能重用,所以,下文都不考虑样本的重用。

3.2 只用一个 low-fidelity 模型:[2] 基础上的改进

  • 首先,放缩
    \(\rm MSE(\hat E_n^{CA-MFMC})\le\frac{2\sigma_0^2}{p-n}(c_{a,1}r_{a,1}(n_1)+c_{c,1}r_{c,1}(n_1))\)
    ,将它记为 u1。接下来,我们关心这个 upper bound 何时存在唯一的全局最小值。
    • PS:证明直接看原文吧,本科高数难度。
  • 命题 1 :u1 何时存在唯一的全局最小值:
    • 假设满足
      \(c_{a,1}r''_{a,1}(n_1)+c_{c,1}r''_{c,1}(n_1)\gt0\)
      【公式 (3.6)】。那么,u1 具有唯一的全局最小值
      \(n_1^*\in[1,p-1]\)
  • 命题 2 :假设对于所有
    \(n_1\in(0,\infty)\)
    满足 公式 (3.6),
    • 并且存在一个
      \(\bar n_1\in(0,\infty)\)
      使得
      \(c_{a,1}r_{a,1}(\bar n_1)+c_{c,1}r'_{c,1}(\bar n_1)=0\)
      。那么
      \(\bar n_1\)
      是唯一的,并且
      \(n_1^*\le\max\{1,\bar n_1\}\)

3.3 context-aware multi-fidelity MC sampling

一种 sequential 训练方法,来为 CA-MFMC estimator 拟合 hierarchies of low-fidelity models,其中每一步都实现了 training 和 sampling 之间的 optimal trade-off。

我主要关心 context-aware 是什么东西。

  • 引理 1:在假设 1 假设 2 下,CA-MFMC estimator 的 MSE 的 upper bound:
    • \(\rm MSE(\hat E_{n_1,\cdots,n_k}^{CA-MFMC}) \le \frac{(k+1)\sigma_0^2}{p_{k-1}-n_k}(\kappa_{k-1}+\hat c_{a,k}r_{a,k}(n_k)+c_{c,k}r_{c,k}(n_k))\)
    • 其中
      \(p_{k-1}=p-\sum_{j=1}^{k-1}n_j,~~p_0=p\)
    • \(\kappa_{k-1}=c_{a,1}r_{a,1}(n_1)+\sum_{j=1}^{k-2}c_{c,j}r_{c,j}(n_j)c_{a,j+1}r_{a,j+1}(n_{j+1}),~~\kappa_0=0\)
    • \(\hat c_{a,k} = c_{c,k-1}r_{c,k-1}(n_{k-1})c_{a,k},~~\hat c_{a,1} =c_{a,1}\)
    • (重申:n 是训 low-fidelity model 的样本数量)
    • 证明:直接用一个 平方和不等式 展开。
  • 看这个 upper bound 括号内加和的部分,
    \(\hat c_{a,k}\)

    \(κ_{k-1}\)
    都仅依赖于
    \(n_1, \cdots,n_{k-1}\)
    ,而
    \(r_{a,k}(n_k),~r_{ck}(n_k)\)
    仅依赖于 n_k。这启发了一种 sequentially 向 CA-MFMC estimator 添加 low-fidelity model 的做法。
    • 给定
      \(n_1, \cdots,n_{k-1}\)
      ,寻找
      \(n_k\)
      ,使得
      \(u_j(n_j;n_1, \cdots,n_{k-1}):[1,p_{j-1}-1]\rightarrow(0,\infty)\)

      \(u_j(n_j;n_1, \cdots,n_{k-1})=\frac1{p_{j-1}-n_j}(\kappa_{j-1}+\hat c_{a,j}r_{a,j}(n_j)+c_{c,k}r_{c,k}(n_j))\)
  • 命题 3:使用命题 1,即
    \(n_1^*\)
    是 u1 的全局最小值。现在去考虑 j = 2,3,...,k。

    • \(\hat{c}_{a, j} r_{a, j}^{\prime \prime}\left(n_j\right)+c_{c, j} r_{c, j}^{\prime \prime}\left(n_j\right)>0\)
      ,则存在 u_j 的全局最小值
      \(n_j^* \in\left[1, p_{j-1}-1\right]\)
    • 证明好像跟命题 1 同理。
  • 命题 4:使用命题 1,即
    \(n_j^*\)
    是 u_j 的全局最小值。
    • 若存在
      \(\bar{n}_j \in(0, \infty)\)
      使得
      \(\hat{c}_{a, j} r_{a, j}^{\prime}\left(\bar{n}_j\right)+c_{c, j} r_{c, j}^{\prime}\left(\bar{n}_j\right)=0\)
      ,则有
      \(n_j^* \leq \bar{n}_j\)
      ,即
      \(n_j^*\)
      的一个 upper bound。
    • 继续跟命题 2 同理,归纳法。
  • 一个备注:models 的 hierarchy 必须满足评估次数 m 递减(2.1)。

啊…… 这就结束了?感觉看了一肚子数学…

4 experiment

图挺好看的。

要赶着看 MFRL 了,不细看了。


业务场景

在实际工作当中,遇到一个场景,就是在用户注册时,名字要全局唯一,当然,我们是可以对用户进行删除的,你会怎么去做?


分析

一般来说,我们可以在用户注册请求时,进行查库校验,看看名字是否已经存在,如果存在就抛异常给提示;否则,就落库。
除此之外,还可以直接给数据库字段加唯一索引

UNIQUE KEY `name_index` (`name`) USING BTREE

当前这种需要根据实际情况分析:

  • 如果我们删除用户是物理删除,就是直接delete,没问题
  • 如果我们删除用户是逻辑删除,相对于update数据的删除标识为1,这时候你怎么建唯一索引?
    针对第二种情况,可能很多人会说,把删除标识字段也加到索引里面,类似
NIQUE KEY `name_index` (`name`,`is_deleted`) USING BTREE

这里会有问题,当我们进行相同用户第二次删除之后,把id=3的数据删除(逻辑),修改is_deleted=1,此时就会报错,如下图

+----+---------+-----------+
| id | name | is_deleted |
+----+---------+-----------+
| 1 | forlan0 | 0 |
| 2 | forlan1 | 1 |
| 3 | forlan1 | 0 |
+----+---------+-----------+

唯一索引不通过
那么,针对逻辑删除这种情况,怎么处理?


解决

1、删除时,修改is_deleted=主键

UPDATE forlan SET `is_deleted` = id WHERE `id` = 3;
--修改后的数据如下
+----+---------+------------+
| id | name | is_deleted |
+----+---------+------------+
| 1 | forlan0 | 0 |
| 2 | forlan1 | 2 |
| 3 | forlan1 | 3 |
+----+---------+------------+

2、删除时,修改is_deleted=null
这种做法,不是会有两条相同的数据?下面的情况允许存在?

UPDATE forlan SET `is_deleted` = NULL WHERE `id` = 3;
--修改后的数据如下
+----+---------+------------+
| id | name | is_deleted |
+----+---------+------------+
| 1 | forlan0 | 0 |
| 2 | forlan1 | NULL |
| 3 | forlan1 | NULL |
+----+---------+------------+

Mysql官方文档的解释

A UNIQUE index creates a constraint such that all values in the index must be distinct. An error occurs if you try to add a new row with a key value that matches an existing row. This constraint does not apply to NULL values except for the BDB storage engine. For other engines, a UNIQUE index allows multiple NULL values for columns that can contain NULL.

其实大概意思就是,除BDB存储引擎外,此约束不适用于NULL值。对于其他引擎,UNIQUE索引允许包含NULL的列有多个NULL值

为什么允许这么搞?
我的理解是,NULL其实就表示未知,未知的东西,无法进行判断;如果NULL对唯一索引起作用,那么就会导致只能有1行数据为空,我们的业务场景,可能需要用NULL去表示未知或不确定的值。

当前,还是不太建议使用NULL,可能存在一些其它问题,比如:

  • 数据丢失
    阿里巴巴规范里面也说了,count(*) 会统计值为 NULL 的行,而 count(列名) 不会统计此列为 NULL 值的行
    WHERE条件
    !=
    不会查到NULL的值
  • 程序空指针报错,比如我们使用SUM(cloumn),如果字段都为NULL,最终返回NULL
  • 增加查询难度
    查询时,语法需要使用IS NULL 、IS NOT NULL、IFNULL(cloumn) 而传统的 =、!=等就不能使用了

3、新建一个字段delete_id,删除时,修改delete_id=主键
正常来说,其实1,2种方案已经满足,为什么我们要使用这种?
假设我们的表已经上线使用了一段时间,这时我们需要建唯一索引,就可以采取方案,实际上就是在删除的时候,多更新一个字段

UPDATE forlan SET `is_deleted` = 1,delete_id = id WHERE `id` = 3;


总结

有3种数据库层面的解决方案:

  • 删除时,修改is_deleted=主键
  • 删除时,修改is_deleted=null
  • 新建一个字段delete_id,删除时,修改delete_id=主键

至于怎么选择,看业务场景:
如果是已经投入使用的业务,可以采取方案3,否则可以采取方案1。

前言

在上个实验中,我们已经实现了简单智能合约实现及客户端开发,但该实验中智能合约只有基础的增删改查功能,且其中的数据管理功能与传统 MySQL 比相差甚远。本文将在前面实验的基础上,将 Hyperledger Fabric 的默认数据库支持 LevelDB 改为 CouchDB 模式,以实现更复杂的数据检索功能。此外,对上个实验的简单智能合约进一步进行功能上和设计上的扩展,最终实现了智能合约的分包、分页查询、多字段富查询、查询交易历史记录等功能。

网络架构

本文网络结构直接将
Hyperledger Fabric无排序组织以Raft协议启动多个Orderer服务、TLS组织运行维护Orderer服务
中创建的 4-2_RunOrdererByCouncil 复制为 7_CouchDBAndComplexContract 并修改(建议直接将本案例仓库
FabricLearn
下的 7_CouchDBAndComplexContract 目录拷贝到本地运行),文中大部分命令在
Hyperledger Fabric定制联盟链网络工程实践
中已有介绍因此不会详细说明,默认情况下,所有操作皆在 7_CouchDBAndComplexContract 根目录下执行。修改成功后网络共包含四个组织—— council 、 soft 、 web 、 hard , 其中 council 组织为网络提供 TLS-CA 服务,并且运行维护着三个 orderer 服务;其余每个组织都运行维护着一个 peer 节点、一个 couchDB 服务、一个 admin 用户和一个 user 用户,实验最终网络结构如下:

运行端口 说明
council.ifantasy.net 7050 council 组织的 CA 服务, 为联盟链网络提供 TLS-CA 服务
orderer1.council.ifantasy.net 7051 council 组织的 orderer1 服务
orderer1.council.ifantasy.net 7052 council 组织的 orderer1 服务的 admin 服务
orderer2.council.ifantasy.net 7054 council 组织的 orderer2 服务
orderer2.council.ifantasy.net 7055 council 组织的 orderer2 服务的 admin 服务
orderer3.council.ifantasy.net 7057 council 组织的 orderer3 服务
orderer3.council.ifantasy.net 7058 council 组织的 orderer3 服务的 admin 服务
soft.ifantasy.net 7250 soft 组织的 CA 服务, 包含成员: peer1 、 admin1 、user1
peer1.soft.ifantasy.net 7251 soft 组织的 peer1 成员节点
couchdb.soft.ifantasy.net 7255 soft 组织的 couchdb 成员节点
web.ifantasy.net 7350 web 组织的 CA 服务, 包含成员: peer1 、 admin1 、user1
peer1.web.ifantasy.net 7351 web 组织的 peer1 成员节点
couchdb.web.ifantasy.net 7355 web 组织的 couchdb 成员节点
hard.ifantasy.net 7450 hard 组织的 CA 服务, 包含成员: peer1 、 admin1 、user1
peer1.hard.ifantasy.net 7451 hard 组织的 peer1 成员节点
couchdb.hard.ifantasy.net 7455 hard 组织的 couchdb 成员节点

添加CouchDB支持并启动网络

添加CouchDB支持

首先,在
envpeer1soft

envpeer1soft

envpeer1soft
中添加 CouchDB 版本变量:

export COUCHDB_VERSION=3.2

然后,向
compose/docker-base.yaml
文件添加基础 CouchDB 镜像:

couchdb-base:
    image: couchdb:${COUCHDB_VERSION}
    environment:
      - COUCHDB_USER=admin
      - COUCHDB_PASSWORD=adminpw
    networks:
      - ${DOCKER_NETWORKS}

之后,向
compose/docker-compose.yaml
中的每个组织添加 CouchDB 容器:

couchdb.soft.ifantasy.net:
    container_name: couchdb.soft.ifantasy.net
    extends:
      file: docker-base.yaml
      service: couchdb-base
    ports:
      - 7255:5984

couchdb.web.ifantasy.net:
    container_name: couchdb.web.ifantasy.net
    extends:
      file: docker-base.yaml
      service: couchdb-base
    ports:
      - 7355:5984

couchdb.hard.ifantasy.net:
    container_name: couchdb.hard.ifantasy.net
    extends:
      file: docker-base.yaml
      service: couchdb-base
    ports:
      - 7455:5984

最后,修改
compose/docker-compose.yaml
中每个 peer 容器的储存方式(以 peer1.soft.ifantasy.net 为例):

  peer1.soft.ifantasy.net:
    container_name: peer1.soft.ifantasy.net
    extends:
      file: docker-base.yaml
      service: peer-base
    environment:
      - CORE_PEER_ID=peer1.soft.ifantasy.net
      - CORE_PEER_LISTENADDRESS=0.0.0.0:7251
      - CORE_PEER_ADDRESS=peer1.soft.ifantasy.net:7251
      - CORE_PEER_LOCALMSPID=softMSP
      - CORE_PEER_GOSSIP_EXTERNALENDPOINT=peer1.soft.ifantasy.net:7251
      - CORE_LEDGER_STATE_STATEDATABASE=CouchDB
      - CORE_LEDGER_STATE_COUCHDBCONFIG_COUCHDBADDRESS=couchdb.soft.ifantasy.net:5984   # 必须为容器内端口
      - CORE_LEDGER_STATE_COUCHDBCONFIG_USERNAME=admin
      - CORE_LEDGER_STATE_COUCHDBCONFIG_PASSWORD=adminpw
    volumes:
      - ${LOCAL_CA_PATH}/soft.ifantasy.net/registers/peer1:${DOCKER_CA_PATH}/peer
    ports:
      - 7251:7251
    depends_on:
      - couchdb.soft.ifantasy.net

注意,参数
CORE_LEDGER_STATE_COUCHDBCONFIG_COUCHDBADDRESS
后的服务端口必须为 couchdb 容器的内部端口,原因不得而知, 完整代码见
FabricLearn
下的
7_CouchDBAndComplexContract/compose
目录。

启动实验网络

在上述修改完成后,在 7_CouchDBAndComplexContract 目录下按顺序执行以下命令启动基础实验网络:

  1. 设置DNS(如果未设置):
    ./setDNS.sh
  2. 设置环境变量:
    source envpeer1soft
  3. 启动CA网络:
    ./0_Restart.sh
  4. 注册用户:
    ./1_RegisterUser.sh
  5. 获取用户证书:
    ./2_EnrollUser.sh
  6. 配置通道:
    ./3_Configtxgen.sh

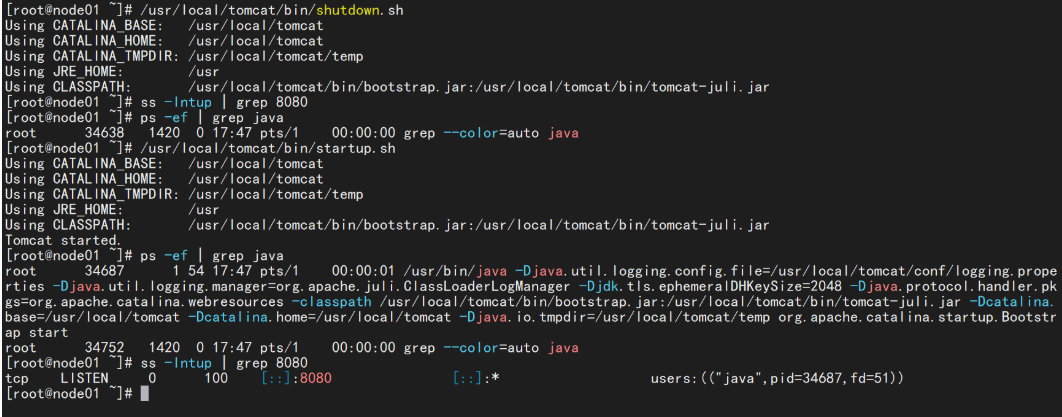
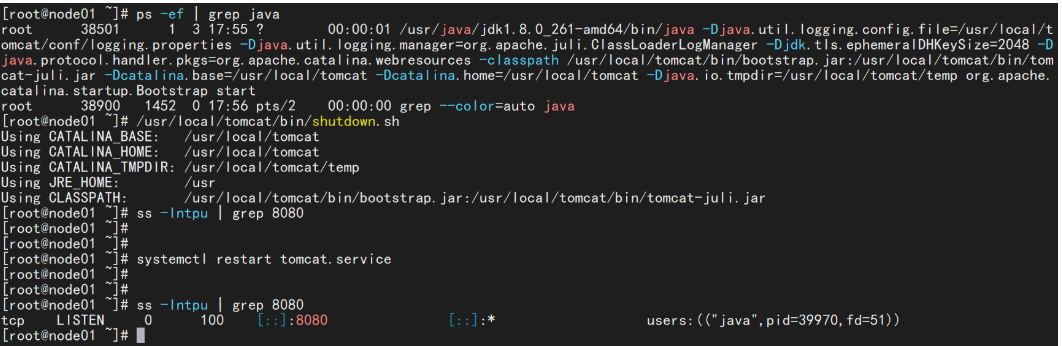
网络启动成功后可见包含 couchdb 容器:

初始 docker 网络

合约开发

本节所用智能合约由前一篇文章
Hyperledger Fabric 智能合约开发及 fabric-sdk-go/fabric-gateway 使用示例
改进(拆分)而来,在上篇文章的基础上对合约进行分包分文件处理,使项目具有更好的目录结构。在实验根目录 7_CouchDBAndComplexContract 下创建目录 project_contract 作为智能合约根目录,在 project_contract 下执行以下命令初始化 GO 模块:

go mod init github.com/wefantasy/FabricLearn/7_CouchDBAndComplexContract/project_contract

tools 层

tools 层主要用于编写智能合约通用工具,创建 tools/contract.go 工具类,主要包含以下函数:

  • ConstructResultByIterator
    : 根据 fabric 查询结果
    shim.StateQueryIteratorInterface
    生成对应切片。
    // 根据查询结果生成切片
    func ConstructResultByIterator[T interface{}](resultsIterator shim.StateQueryIteratorInterface) ([]*T, error) {
        var txs []*T
        for resultsIterator.HasNext() {
            queryResult, err := resultsIterator.Next()
            if err != nil {
                return nil, err
            }
            var tx T
            err = json.Unmarshal(queryResult.Value, &tx)
            if err != nil {
                return nil, err
            }
            txs = append(txs, &tx)
        }
        fmt.Println("select result length: ", len(txs))
        return txs, nil
    }
    
  • SelectByQueryString
    : 根据 couchdb 查询字符串完成查询操作,并返回对应切片。
    // 根据查询字符串查询
    func SelectByQueryString[T interface{}](ctx contractapi.TransactionContextInterface, queryString string) ([]*T, error) {
        resultsIterator, err := ctx.GetStub().GetQueryResult(queryString)
        if err != nil {
            return nil, err
        }
        defer resultsIterator.Close()
    
        return ConstructResultByIterator[T](resultsIterator)
    }
    
  • SelectByQueryStringWithPagination
    : 根据 couchdb 查询字符串分页查询,并返回对应切片。
    // 根据擦查询字符串分页查询
    func SelectByQueryStringWithPagination[T interface{}](ctx contractapi.TransactionContextInterface, queryString string, pageSize int32, bookmark string) (*model.PaginatedQueryResult[T], error) {
        resultsIterator, responseMetadata, err := ctx.GetStub().GetQueryResultWithPagination(queryString, pageSize, bookmark)
        if err != nil {
            return nil, err
        }
        defer resultsIterator.Close()
        var txs []T
        for resultsIterator.HasNext() {
            queryResult, err := resultsIterator.Next()
            if err != nil {
                return nil, err
            }
            var tx T
            err = json.Unmarshal(queryResult.Value, &tx)
            if err != nil {
                return nil, err
            }
            txs = append(txs, tx)
        }
        return &model.PaginatedQueryResult[T]{
            Records:             txs,
            FetchedRecordsCount: responseMetadata.FetchedRecordsCount,
            Bookmark:            responseMetadata.Bookmark,
        }, nil
    }
    
  • SelectHistoryByIndex
    : 获得交易创建之后的所有变化(区块链账本)。
    // 获得交易创建之后的所有变化.
    func SelectHistoryByIndex[T interface{}](ctx contractapi.TransactionContextInterface, index string) ([]model.HistoryQueryResult[T], error) {
        resultsIterator, err := ctx.GetStub().GetHistoryForKey(index)
        if err != nil {
            return nil, err
        }
        defer resultsIterator.Close()
    
        var records []model.HistoryQueryResult[T]
        for resultsIterator.HasNext() {
            response, err := resultsIterator.Next()
            if err != nil {
                return nil, err
            }
    
            var tx T
            if len(response.Value) > 0 {
                err = json.Unmarshal(response.Value, &tx)
                if err != nil {
                    return nil, err
                }
            }
            record := model.HistoryQueryResult[T]{
                TxId:      response.TxId,
                Record:    tx,
                IsDelete:  response.IsDelete,
            }
            records = append(records, record)
        }
        return records, nil
    }
    

model 层

model层主要用于申明合约所用数据结构,其中
model/project.go
内容如下:

package model

type Project struct {
Table        string `json:"table" form:"table"` //  数据库标记
ID           string `json:"ID"`                 // 项目唯一ID
Name         string `json:"Name"`               // 项目名称
Username     string `json:"username"`           // 项目主要负责人
Organization string `json:"Organization"`       // 项目所属组织
Category     string `json:"Category"`           // 项目所属类别
Url          string `json:"Url"`                // 项目介绍地址
Describes    string `json:"Describes"`          // 项目描述
}

func (o *Project) Index() string {
o.Table = "project"
return o.ID
}

func (o *Project) IndexKey() string {
return "table~ID~name"
}

func (o *Project) IndexAttr() []string {
return []string{o.Table, o.ID, o.Name}
}

其中
Index
函数用于标识模型的唯一主键;
IndexKey
函数用于标识自建索引的字段,其中
命名方式必须与字段申明的结构体标记 json 一致(大小写)
;IndexAttr
用于构造具体的索引。
model/user.go
申明了用户的字段信息:

package model

// User  用户表
type User struct {
Table    string `json:"table" form:"table"`       //  数据库标记
Username string `json:"username" form:"username"` //用户账户
Name     string `json:"name" form:"name"`         //真实姓名
Email    string `json:"email" form:"email"`       //  邮箱
Phone    string `json:"phone" form:"phone"`       //  手机
}

func (o *User) Index() string {
o.Table = "user"
return o.Username
}

func (o *User) IndexKey() string {
return "table~username~name"
}

func (o *User) IndexAttr() []string {
return []string{o.Table, o.Username, o.Name}
}

model/base.go
申明了基于 CouchDB 的富查询结果模型:

package model

import "time"

// 历史查询结果
type HistoryQueryResult[T interface{}] struct {
Record    T         `json:"record"`
TxId      string    `json:"txId"`
Timestamp time.Time `json:"timestamp"`
IsDelete  bool      `json:"isDelete"`
}

// 分页查询结果
type PaginatedQueryResult[T interface{}] struct {
Records             []T    `json:"records"`
FetchedRecordsCount int32  `json:"fetchedRecordsCount"`
Bookmark            string `json:"bookmark"`
}

contract 层

contract 层用于实现智能合约的核心逻辑(本示例为 model 的增删改查),由于结合了 CouchDB ,所以相比上个实验需要更复杂的实现。以
contract/project.go
为例进行介绍,由于代码太长在此就不再粘贴(完整代码参考
project.go
),其中主要功能及实现方式如下:

  • 插入数据( Insert ):先使用
    ctx.GetStub().PutState(tx.Index(), txb)
    方法插入数据,然后调用
    ctx.GetStub().CreateCompositeKey(tx.IndexKey(), tx.IndexAttr())
    方法为该数据创建 CouchDB 索引,最后调用
    ctx.GetStub().PutState(indexKey, value)
    将索引存入链上。
  • 更新数据( Update ):先使用
    indexKey, err := ctx.GetStub().CreateCompositeKey(otx.IndexKey(), otx.IndexAttr())
    得到旧数据的索引,再调用
    ctx.GetStub().DelState(indexKey)
    删除旧数据的索引,然后调用
    ctx.GetStub().PutState(tx.Index(), txb)
    更新数据,最后分别调用
    ctx.GetStub().CreateCompositeKey(tx.IndexKey(), tx.IndexAttr())

    ctx.GetStub().PutState(indexKey, value)
    创建新数据索引并存入链上。
  • 删除数据( Delete ):先使用
    ctx.GetStub().DelState(anstx.Index())
    删除旧数据,再调用
    indexKey, err := ctx.GetStub().CreateCompositeKey(tx.IndexKey(), tx.IndexAttr())
    得到旧数据索引,最后通过
    ctx.GetStub().DelState(indexKey)
    删除旧数据索引。
  • 读取指定index的记录( SelectByIndex ):使用形如
    {"selector":{"ID":"%s", "table":"project"}}
    的 CouchDB 查询语法根据索引查询数据。
  • 读取所有数据( SelectAll ):使用形如
    {"selector":{"table":"project"}}
    的 CouchDB 查询语法查询所有相关数据。
  • 按某索引查询所有数据( SelectBySome ):使用形如
    {"selector":{"%s":"%s", "table":"project"}}
    的 CouchDB 查询语法根据索引查询数据。
  • 富分页查询所有数据( SelectAllWithPagination ):使用形如
    {"selector":{"table":"project"}}
    的 CouchDB 查询语法调用上述分页查询数据工具 tools.SelectByQueryStringWithPagination 来查询数据。
  • 按关键字富分页查询所有数据 SelectBySomeWithPagination ):使用形如
    {"selector":{"%s":"%s","table":"project"}}
    的 CouchDB 查询语法调用上述分页查询数据工具
    tools.SelectByQueryStringWithPagination
    来查询数据。
  • 按某索引查询数据历史( SelectHistoryByIndex ):调用上述历史数据查询工具
    tools.SelectHistoryByIndex
    来查询数据。

contract/user.go

model/user.go
的核心操作逻辑,此示例只包含简单的功能,完整源码参考
user.go

main 主函数

主函数完整代码如下所示:

package main

import (
        "github.com/hyperledger/fabric-contract-api-go/contractapi"
        "github.com/wefantasy/FabricLearn/7_CouchDBAndComplexContract/project_contract/contract"
)

func main() {
        chaincode, err := contractapi.NewChaincode(&contract.UserContract{}, &contract.ProjectContract{})
        if err != nil {
                panic(err)
        }

        if err := chaincode.Start(); err != nil {
                panic(err)
        }
}

多智能合约只需在 main 的
contractapi.NewChaincode
函数中按顺序申明即可。在智能合约编写完毕后使用
go mod vendor
来打包依赖,上述工作完成后 project_contract 目录结构及解释如下所示:

project_contract
├── contract            // 智能合约核心逻辑
│   ├── project.go
│   └── user.go
├── go.mod
├── go.sum
├── main.go             // 智能合约入口函数
├── model               // 申明数据模型
│   ├── base.go         // 申明分页等数据结构
│   ├── project.go
│   └── user.go
├── tools               // 工具目录
│   └── contract.go     // 智能合约通用工具,查询历史/分页查询等
└── vendor              // 依赖目录

合约部署和测试

如无特殊说明,以下命令默认运行于实验根目录 7_CouchDBAndComplexContract 下:

  1. 合约打包
    source envpeer1soft
    peer lifecycle chaincode package basic.tar.gz --path project_contract --label basic_1
    
  2. 三组织安装
     source envpeer1soft
     peer lifecycle chaincode install basic.tar.gz
     peer lifecycle chaincode queryinstalled
     source envpeer1web
     peer lifecycle chaincode install basic.tar.gz
     peer lifecycle chaincode queryinstalled
     source envpeer1hard
     peer lifecycle chaincode install basic.tar.gz
     peer lifecycle chaincode queryinstalled
    
  3. 三组织批准
    export CHAINCODE_ID=basic_1:22e38a78d2ddfe9c3cbeff91140ee209c901adcc24cd2b11f863a53abcdc825a
    source envpeer1soft
    peer lifecycle chaincode approveformyorg -o orderer1.council.ifantasy.net:7051 --tls --cafile $ORDERER_CA  --channelID testchannel --name basic --version 1.0 --sequence 1 --waitForEvent --package-id $CHAINCODE_ID
    peer lifecycle chaincode queryapproved -C testchannel -n basic --sequence 1
    source envpeer1web
    peer lifecycle chaincode approveformyorg -o orderer3.council.ifantasy.net:7057 --tls --cafile $ORDERER_CA  --channelID testchannel --name basic --version 1.0 --sequence 1 --waitForEvent --package-id $CHAINCODE_ID
    peer lifecycle chaincode queryapproved -C testchannel -n basic --sequence 1
    source envpeer1hard
    peer lifecycle chaincode approveformyorg -o orderer2.council.ifantasy.net:7054 --tls --cafile $ORDERER_CA  --channelID testchannel --name basic --version 1.0 --sequence 1 --waitForEvent --package-id $CHAINCODE_ID
    peer lifecycle chaincode queryapproved -C testchannel -n basic --sequence 1
    

    注意:由于我们有两个智能合约,且每个智能合约都包含
    InitLedger
    函数来初始化数据,所以在这里以及后续链码操作中需要删除
    --init-required
    参数(因为合约不需要初始化)。
  4. 提交链码
    source envpeer1soft
    peer lifecycle chaincode commit -o orderer2.council.ifantasy.net:7054 --tls --cafile $ORDERER_CA --channelID testchannel --name basic --version 1.0 --sequence 1 --peerAddresses peer1.soft.ifantasy.net:7251 --tlsRootCertFiles $CORE_PEER_TLS_ROOTCERT_FILE --peerAddresses peer1.web.ifantasy.net:7351 --tlsRootCertFiles $CORE_PEER_TLS_ROOTCERT_FILE
    
  5. 初始化链码数据并测试
    source envpeer1soft
    peer chaincode invoke -o orderer1.council.ifantasy.net:7051 --tls --cafile $ORDERER_CA --channelID testchannel --name basic --peerAddresses peer1.soft.ifantasy.net:7251 --tlsRootCertFiles $CORE_PEER_TLS_ROOTCERT_FILE --peerAddresses peer1.web.ifantasy.net:7351 --tlsRootCertFiles $CORE_PEER_TLS_ROOTCERT_FILE -c '{"Args":["UserContract:InitLedger"]}'
    peer chaincode invoke -o orderer1.council.ifantasy.net:7051 --tls --cafile $ORDERER_CA --channelID testchannel --name basic --peerAddresses peer1.soft.ifantasy.net:7251 --tlsRootCertFiles $CORE_PEER_TLS_ROOTCERT_FILE --peerAddresses peer1.web.ifantasy.net:7351 --tlsRootCertFiles $CORE_PEER_TLS_ROOTCERT_FILE -c '{"Args":["ProjectContract:InitLedger"]}'
    
    peer chaincode invoke -o orderer1.council.ifantasy.net:7051 --tls --cafile $ORDERER_CA --channelID testchannel --name basic --peerAddresses peer1.soft.ifantasy.net:7251 --tlsRootCertFiles $CORE_PEER_TLS_ROOTCERT_FILE --peerAddresses peer1.web.ifantasy.net:7351 --tlsRootCertFiles $CORE_PEER_TLS_ROOTCERT_FILE -c '{"Args":["UserContract:GetAllUsers"]}'
    peer chaincode invoke -o orderer1.council.ifantasy.net:7051 --tls --cafile $ORDERER_CA --channelID testchannel --name basic --peerAddresses peer1.soft.ifantasy.net:7251 --tlsRootCertFiles $CORE_PEER_TLS_ROOTCERT_FILE --peerAddresses peer1.web.ifantasy.net:7351 --tlsRootCertFiles $CORE_PEER_TLS_ROOTCERT_FILE -c '{"Args":["ProjectContract:SelectAll"]}'
    peer chaincode invoke -o orderer1.council.ifantasy.net:7051 --tls --cafile $ORDERER_CA --channelID testchannel --name basic --peerAddresses peer1.soft.ifantasy.net:7251 --tlsRootCertFiles $CORE_PEER_TLS_ROOTCERT_FILE --peerAddresses peer1.web.ifantasy.net:7351 --tlsRootCertFiles $CORE_PEER_TLS_ROOTCERT_FILE -c '{"Args":["ProjectContract:SelectBySome", "name", "工作室联盟链管理系统"]}'
    

注意,在多合约的情况下调用链码,需要在所调用的合约函数前指定所属合约,如
ProjectContract:SelectBySome
,其它合约示例调用方式大致一样,在此不再赘述。此外由于 CouchDB 自带了数据库管理界面,则可以通过本例中任意一个 CouchDB 的服务地址来访问链上数据,如
http://192.168.27.72:7355/_utils/#login
(虚拟机IP为
192.168.27.72
,soft 组织的 CouchDB 端口
7355
),输入docker中配置的账户
admin
密码
adminpw
即可进入系统:
登陆界面
合约数据
至此,本实验基本完成。

可能存在的问题

  1. peer lifecycle chaincode install
    时遇到错误:
Error creating tx-manage chaincode: Error compiling schema for DataContract [SelectBySomeWithPagination]. Return schema invalid. Object has no key 'PaginatedQueryResult[github.com'
panic: Error creating tx-manage chaincode: Error compiling schema for DataContract [SelectBySomeWithPagination]. Return schema invalid. Object has no key 'PaginatedQueryResult[github.com'

goroutine 1 [running]:
log.Panicf({0xa24b02?, 0x1?}, {0xc00014ff50?, 0x407679?, 0x404c71?})
        /usr/local/go/src/log/log.go:392 +0x67
main.main()
        /chaincode/input/src/main.go:201 +0x8e

原因及解决方法: 所用 docker fabric 2.4 镜像的 Golang 版本太低不支持泛型,需要删除并重新安装 docker fabric 2.4 (尽管 tag 一样,但镜像内容会更新)。

  1. 智能合约调用时遇到错误:
[notice] 2022-11-13T12:13:49.502557Z nonode@nohost <0.286.0> -------- rexi_server : started servers
[notice] 2022-11-13T12:13:49.504490Z nonode@nohost <0.290.0> -------- rexi_buffer : started servers
[warning] 2022-11-13T12:13:49.530610Z nonode@nohost <0.298.0> -------- creating missing database: _nodes
[info] 2022-11-13T12:13:49.530670Z nonode@nohost <0.299.0> -------- open_result error {not_found,no_db_file} for _nodes
[error] 2022-11-13T12:13:49.537681Z nonode@nohost <0.304.0> -------- CRASH REPORT Process  (<0.304.0>) with 2 neighbors crashed with reason: no match of right hand value {error,enospc} at couch_bt_engine:init/2(line:154) <= 
……

原因及解决方法: 可能是 docker volume 把硬盘占满了,使用
docker volume rm $(docker volume ls -qf dangling=true)
清除所有再重试
使用

  1. 遇到错误:
# github.com/hyperledger/fabric-sdk-go/internal/github.com/hyperledger/fabric/discovery/client
/root/go/pkg/mod/github.com/hyperledger/fabric-sdk-go@v1.0.0/internal/github.com/hyperledger/fabric/discovery/client/api.go:47:38: undefined: discovery.ChaincodeCall
/root/go/pkg/mod/github.com/hyperledger/fabric-sdk-go@v1.0.0/internal/github.com/hyperledger/fabric/discovery/client/client.go:83:63: undefined: discovery.ChaincodeInterest
/root/go/pkg/mod/github.com/hyperledger/fabric-sdk-go@v1.0.0/internal/github.com/hyperledger/fabric/discovery/client/client.go:120:65: undefined: discovery.ChaincodeCall
/root/go/pkg/mod/github.com/hyperledger/fabric-sdk-go@v1.0.0/internal/github.com/hyperledger/fabric/discovery/client/client.go:124:23: undefined: discovery.ChaincodeInterest
/root/go/pkg/mod/github.com/hyperledger/fabric-sdk-go@v1.0.0/internal/github.com/hyperledger/fabric/discovery/client/client.go:229:105: undefined: discovery.ChaincodeCall
/root/go/pkg/mod/github.com/hyperledger/fabric-sdk-go@v1.0.0/internal/github.com/hyperledger/fabric/discovery/client/client.go:247:64: undefined: discovery.ChaincodeCall
/root/go/pkg/mod/github.com/hyperledger/fabric-sdk-go@v1.0.0/internal/github.com/hyperledger/fabric/discovery/client/client.go:604:48: undefined: discovery.ChaincodeInterest
/root/go/pkg/mod/github.com/hyperledger/fabric-sdk-go@v1.0.0/internal/github.com/hyperledger/fabric/discovery/client/client.go:620:35: undefined: discovery.ChaincodeCall

原因及解决方法:
github.com/hyperledger/fabric-sdk-go
需要指定 20220117 版本,将
go.mod
文件对应依赖替换如下:

github.com/hyperledger/fabric-sdk-go v1.0.1-0.20220117114400-c848d119936b。
  1. 遇到错误:
Error compiling schema for ****[**]. Return schema invalid. Object has no key 'Wrapper[[]<part of module name>'

原因及解决方法:
智能合约返回值不支持泛型
,将智能合约返回值换成 interface{} 即可。

  1. 查询历史记录出现遇到错误:
Error: could not assemble transaction: ProposalResponsePayloads do not match (base64):

原因及解决方法:链码输出(返回)
数据中不要使用地址传递
(推荐值传递),因为地址都是动态分配,每次取到的值都不一样,造成共识失败。

  1. 遇到错误:
Failed to evaluate: Multiple errors occurred: - Transaction processing for endorser [localhost:7451]: Chaincode status Code: (500) UNKNOWN. Description: Error handling success response. Value did not match schema:\n1. return: Invalid type. Expected: array, given: string - Transaction processing for endorser [localhost:7251]: Chaincode status Code: (500) UNKNOWN. Description: Error handling success response. Value did not match schema:\n1. return: Invalid type. Expected: array, given: string

原因及解决方法:链码返回值不能为 []byte ,这是一个 fabric 的
bug
,对于复杂返回类型建议直接返回字符串 string

1. 说明
1> 本篇是实际工作中linux上碰到的一个问题,一个使用了CGroup的进程处于R状态但不执行,也不退出,还不能kill,经过深入挖掘才发现是Cgroup的内核bug
2>发现该bug后,去年给RedHat提交过漏洞,但可惜并未通过,不知道为什么,这里就发我博客公开了
3> 前面的2个帖子
《极简cfs公平调度算法》
《极简组调度-CGroup如何限制cpu》
是为了了解本篇这个内核bug而写的,需要linux内核进程调度和CGroup控制的基本原理才能够比较清晰的了解这个内核bug的来龙去脉
4> 本文所用的内核调试工具是crash,大家可以到官网上去查看crash命令的使用,这里就不多介绍了
2. 问题
2.1 触发bug code(code较长,请展开代码)
2.1.1 code

#include <iostream>#include<sys/types.h>#include<signal.h>#include<stdio.h>#include<stdlib.h>#include<unistd.h>#include<errno.h>#include<sys/stat.h>#include<pthread.h>#include<sys/time.h>#include<string>

using namespacestd;
std::
string sub_cgroup_dir("/sys/fs/cgroup/cpu/test");//common lib bool is_dir(const std::string&path)
{
structstat statbuf;if (stat(path.c_str(), &statbuf) == 0)
{
if (0 !=S_ISDIR(statbuf.st_mode))
{
return true;
}
}
return false;
}
bool write_file(const std::string& file_path, intnum)
{
FILE
* fp = fopen(file_path.c_str(), "w");if (fp =NULL)
{
return false;
}

std::
string write_data =to_string(num);
fputs(write_data.c_str(), fp);
fclose(fp);
return true;
}
//ms longget_ms_timestamp()
{
timeval tv;
gettimeofday(
&tv, NULL);return (tv.tv_sec * 1000 + tv.tv_usec / 1000);
}
//cgroup boolcreate_cgroup()
{
if (is_dir(sub_cgroup_dir) == false)
{
if (mkdir(sub_cgroup_dir.c_str(), S_IRWXU | S_IRGRP) != 0)
{
cout
<< "mkdir cgroup dir fail" <<endl;return false;
}
}
int pid =getpid();
cout
<< "pid is" << pid <<endl;
std::
string procs_path = sub_cgroup_dir + "/cgroup.procs";returnwrite_file(procs_path, pid);
}
bool set_period(intperiod)
{
std::
string period_path = sub_cgroup_dir + "/cpu.cfs_period_us";returnwrite_file(period_path, period);
}
bool set_quota(intquota)
{
std::
string quota_path = sub_cgroup_dir + "/cpu.cfs_quota_us";returnwrite_file(quota_path, quota);
}
//thread//param: ms interval void* thread_func(void*param)
{
int i = 0;int interval = (long)param;long last =get_ms_timestamp();while (true)
{
i
++;if (i % 1000 != 0)
{
continue;
}
long current =get_ms_timestamp();if ((current - last) >=interval)
{
usleep(
1000);
last
=current;
}
}

pthread_exit(NULL);
}
voidtest_thread()
{
const int k_thread_num = 10;
pthread_t pthreads[k_thread_num];
for (int i = 0; i < k_thread_num; i++)
{
if (pthread_create(&pthreads[i], NULL, thread_func, (void*)(i + 1)) != 0)
{
cout
<< "create thread fail" <<endl;
}
else{
cout
<< "create thread success,tid is" << pthreads[i] <<endl;
}
}
}
//argv[0] : period//argv[1] : quota int main(int argc,char*argv[])
{
if (argc <3)
{
cout
<< "usage : ./inactive timer $period $quota" <<endl;return -1;
}
int period = stoi(argv[1]);int quota = stoi(argv[2]);
cout
<< "period is" << period <<endl;
cout
<< "quota is" << quota <<endl;

test_thread();
if (create_cgroup() == false)
{
cout
<< "create cgroup fail" <<endl;return -1;
}
int i =0;while (true)
{
if (i > 20)
{
i
= 0;
}

i
++;long current =get_ms_timestamp();long last =current;while ((current - last) <i)
{
usleep(
1000);
current
=get_ms_timestamp();
}

set_period(period);
set_quota(quota);
}
return 0;
}

View Code

2.1.2 编译

g++ -std=c++11 -lpthread trigger_cgroup_timer_inactive.cpp -o inactive_timer

2.1.3 在CentOS7.0~7.5的系统上执行程序

./inactive_timer 100000 10000

2.1.4 上述代码主要干了2件事
1> 将自己进程设置为CGroup控制cpu
2> 反复设置CGroup的cpu.cfs_period_us和cpu.cfs_quota_us
3> 起10个线程消耗cpu
2.1.5
《极简组调度-CGroup如何限制cpu》
已经讲过CGroup限制cpu的原理:
CGroup控制cpu是通过cfs_period_us指定的一个时间周期内,CGroup下的进程,能使用cfs_quota_us时间长度的cpu,如果在该周期内使用的cpu超过了cfs_quota_us设定的值,则将其throttled,即将其从公平调度运行队列中移出,然后等待定时器触发下个周期unthrottle后再移入,从而达到控制cpu的效果。
2.2 现象
1> 程序跑几分钟后,所有的线程一直处于running状态,但实际线程都已经不再执行了,cpu使用率也一直是0
2> 查看线程的stack,task都在系统调用返回中
3> 用crash查看进程的主线程32764状态确实为"running",但对应的0号cpu上的rq cfs运行队列中并没有任何运行task
4> 查看task对应的se没有在rq上,cfs_rq显示被throttled
《极简组调度-CGroup如何限制cpu》
中说过,throttle后经过一个period(程序设的是100ms),CGroup的定时器会再次分配quota,并unthrottle,将group se重新加入到rq中,这里一直throttle不恢复,只能怀疑是不是定时器出问题了
5> 再查看task group对应的cfs_bandwidth的period timer,发现state为0,即HRTIMER_STATE_INACTIVE,表示未激活,问题就在这里,
正常情况下该timer是激活的,该定时器未激活会导致对应cpu上的group cfs_rq分配不到quota,quota用完后就会导致其对应的se被移出rq,此时task虽然处于Ready状态,但由于不在rq上,仍然不会被调度的
3. 原因
3.1 linux的定时器是一次性,到期后需要再次激活才能继续使用,搜索代码可知period_timer是在__start_cfs_bandwidth()中实现调用start_bandwidth_timer()进行激活的
这里有一个关键点,当cfs_b->timer_active不为0时,__start_cfs_bandwidth()就会不激活period_timer,和问题现象相符,那么什么时候cfs_b->timer_active会不为0呢?
3.2 当设置CGroup的quota或者period时,会最终进入到__start_cfs_bandwidth(),这里就会将cfs_b->timer_active设为0,并进入__start_cfs_bandwidth()
tg_set_cfs_quota()
tg_set_cfs_bandwidth()
/*restart the period timer (if active) to handle new period expiry*/ if (runtime_enabled && cfs_b->timer_active) {/*force a reprogram*/cfs_b->timer_active = 0;
__start_cfs_bandwidth(cfs_b);
}
仔细观察上述代码,设想如下场景:
1> 在线程A设置CGroup的quota或者period时,将cfs_b->timer_active设为0,调用_start_cfs_bandwidth()后,在未执行到__start_cfs_bandwidth()代码580行hrtimer_cancel()之前,cpu切换到B线程
2> 线程B也调用__start_cfs_bandwidth(),执行完后将cfs_b->timer_active设为1,并调用start_bandwidth_timer()激活timer,此时cpu切换到线程A
3> 线程A恢复并继续执行,调用hrtimer_cancel()让period_timer失效,然后执行到__start_cfs_bandwidth()代码585行后,发现cfs_b->timer_active为1,直接return,而不再将period_timer激活
3.3 搜索
__start_cfs_bandwidth()的调用,发现
时钟中断中会调用update_curr()函数,其最终会调用assign_cfs_rq_runtime()检查cgroup cpu配额使用情况,决定是否需要throttle,这里在cfs_b->timer_active = 0时,也会调用__start_cfs_bandwidth(),即执行上面B线程的代码,从而和设置CGroup的线程A发生线程竞争,导致timer失效。
1> 完整代码执行流程图

2> 当定时器失效后,由于3.2中线程B将cfs_b->timer_active = 1,所以即使下次时钟中断执行到assign_cfs_rq_runtime()中时,由于误判timer是active的,也不会调用__start_cfs_bandwidth()再次激活timer,这样被throttle的group se永远不会被unthrottle投入rq调度了
3.4 总结
频繁设置CGroup配置,会和时钟中断中检查group quota的线程在__start_cfs_bandwidth()上发生线程竞争,导致period_timer被cancel后不再激活,然后CGroup控制的task不能分配cpu quota,导致不再被调度
3.5 恢复方法
知道了漏洞成因,我们也看到tg_set_cfs_quota()会调用__start_cfs_bandwidth() cancel掉timer,然后重新激活timer,这样就能在timer回调中unthrottle了,所以只要手动设置下这个CGroup的cpu.cfs_period_us或cpu.cfs_quota_us,就能恢复运行。
4. 修复
3.10.0-693以上的版本并不会出现这个问题,通过和2.6.32版本(下图右边)的代码对比,可知3.10.0-693版的代码(下图左边)将hrtimer_cancel()该为hrtimer_try_to_cancel(),并将其和cfs_b->timer_active的判定都放在自旋锁中保护,这样就不会cfs_b->timer_active被置1后,仍然还会去cancel period_timer的问题了,但看这个bug fix的邮件组讨论,是为了修另一个问题顺便把这个问题也修了,痛失给linux提patch的机会- -

5. 漏洞利用
1> 在国内,仍有大量的公司在使用CentOS6和CentOS7.0~7.5,这些系统都存在这个漏洞,使用了CGroup限制cpu就有可能触发这个bug导致业务中断,且还不一定能重启恢复
2> 一旦触发这个bug,由于task本身已经是running状态了,即使去kill,由于task得不到调度,是无法kill掉的,因此可以通过这种方法攻击任意软件程序(如杀毒软件),让其不能执行又不能重启(很多程序为了保证不双开,都会只保证只有一个进程存在),即使他们不用CGroup,也可以给他建一个对其进行攻击
3> 该bug由于是linux内核bug,一旦触发还不易排查和感知,因为看进程状态都是running,直觉上认为进程仍然在正常执行的

总览需求

1. 简述静态网页和动态网页的区别。 
2. 简述 Webl.0 和 Web2.0 的区别。 
3. 安装tomcat8,配置服务启动脚本,部署jpress应用。

1、简述静态网页和动态网页的区别

静态网页:

请求响应信息,发给客户端进行处理,由浏览器进行解析,显示的页面,静态网页包含文本、图像、Flash动画、超链接等内容,在编写网页源代码时已经确定。除非网页源代码被重新修改,否则这些内容不会发生变化。

动态网页:

请求响应信息,发给事务端进行处理,由服务端处理完成,将信息返回给客户端,动态网页有数据库支撑、包含程序以及提供与用户交互的功能,如用户登录、用户注册、信息查询等功能,根据用户传入的不同参数,网页会显示不同的数据。

2、简述 Webl.0 和 Web2.0 的区别

概念:

web1.0:通常称为只读网络,网站是信息性的,仅包含超链接在一起的静态内容,或者简单地说,没有CSS、动态链接、交互性(如登录用户、对博客文章的评论等)。禁止在网上冲浪时在网站上投放广告。是一个内容交付网络 (CDN),可以在网站上展示信息片段。它可以用作个人网站;它根据查看的页面向用户收费;它具有使用户能够检索特定信息的目录。

web2.0:通常称为读写网络。也称为参与式社交网络,社交网络包含许多在线工具和平台,人们可以在其中分享他们的观点、意见、想法和经验,它突出了用户生成的内容、可用性和最终用户的互操作性。

特征的不同之处:

Web1.0:以静态、单向阅读为主,网站内信息可以直接和其他网站信息进行交互,能通过第三方信息平台同时对多家网站信息进行整合使用。

Web2.0:以分享为特征的实时网络,用户在互联网上拥有自己的数据,并能在不同的网站上使用。

3、安装tomcat8,配置服务启动脚本,部署jpress应用

实验步骤:

步骤一:关闭防火墙和selinux

# 设置为开机不启动
[root@node01 ~]# systemctl disable firewalld.service

# 临时停止防火墙
[root@node01 ~]# systemctl stop  firewalld.service

# 手动停止selinux,可以不用重启动虚拟机
[root@node01 ~]# setenforce 0
[root@node01 ~]# vim /etc/selinux/config
[root@node01 ~]# sestatus
SELinux status:                 disabled

# 检查状态
[root@node01 ~]# systemctl is-active firewalld.service
unknown
[root@node01 ~]# getenforce
Disabled

步骤二:配置静态IP地址

# 修改为静态地址,注意子网掩码
[root@node01 ~]# nmcli connection modify ens32 ipv4.method manual ipv4.addresses 192.168.11.110 ipv4.gateway 192.168.11.2 ipv4.dns 8.8.8.8 connection.autoconnect yes

# 启动网卡
[root@node01 ~]# nmcli connection up ens32

步骤三:安装常用软件

[root@node01 ~]# yum install -y bash-completion tree lrzsz  vim  net-tools.x86_64  unzip net-tools  lsof  wget

tomcat是依赖java环境,所以安装jdk,也可以用自带的openjdk

步骤四:上传软件jdk mysql tomcat

[root@node01 ~]# ll
total 784608
-rw-------. 1 root root      1425 Mar 19 13:12 anaconda-ks.cfg
-rw-r--r--  1 root root   9433364 Apr 15 17:16 apache-tomcat-8.5.20.tar.gz
-rw-r--r--  1 root root 127431820 Apr 15 17:18 jdk-8u261-linux-x64.rpm
-rw-r--r--  1 root root 666559924 Mar 19 21:19 mysql-5.7.36-linux-glibc2.12-x86_64.tar.gz

步骤五:安装jdk并查看版本信息

# 安装jdk
[root@node01 ~]# yum install jdk-8u261-linux-x64.rpm -y

# 查看版本 
[root@node01 ~]# java -version
java version "1.8.0_261"
Java(TM) SE Runtime Environment (build 1.8.0_261-b12)
Java HotSpot(TM) 64-Bit Server VM (build 25.261-b12, mixed mode)

步骤六:解压Tomcat到指定目录/usr/local,并创建软链接

# 解压到指定目录
[root@node01 ~]# tar xf apache-tomcat-8.5.20.tar.gz -C /usr/local/

# 进入该目录将Apache文件链接到tomcat
[root@node01 local]# ln -s apache-tomcat-8.5.20/ tomcat

步骤七:重启服务,查看端口监听信息

# 进入路径查看有哪些文件
[root@node01 ~]# cd /usr/local/tomcat/bin/
[root@node01 bin]# ls
bootstrap.jar       commons-daemon.jar            daemon.sh         setclasspath.sh  startup.sh            tool-wrapper.sh
catalina.bat        commons-daemon-native.tar.gz  digest.bat        shutdown.bat     tomcat-juli.jar       version.bat
catalina.sh         configtest.bat                digest.sh         shutdown.sh      tomcat-native.tar.gz  version.sh
catalina-tasks.xml  configtest.sh                 setclasspath.bat  startup.bat      tool-wrapper.bat

# 启动服务
[root@node01 bin]# ./startup.sh
Using CATALINA_BASE:   /usr/local/tomcat
Using CATALINA_HOME:   /usr/local/tomcat
Using CATALINA_TMPDIR: /usr/local/tomcat/temp
Using JRE_HOME:        /usr
Using CLASSPATH:       /usr/local/tomcat/bin/bootstrap.jar:/usr/local/tomcat/bin/tomcat-juli.jar
Tomcat started.

PS:也可以用绝对路径启动,这里只是想看看里面的文件内容

# 查看进程和监听端口信息
[root@node01 bin]# ps -ef | grep tomcat
root      16744      1  1 17:29 pts/2    00:00:01 /usr/bin/java -Djava.util.logging.config.file=/usr/local/tomcat/conf/logging.properties -Djava.util.logging.manager=org.apache.juli.ClassLoaderLogManager -Djdk.tls.ephemeralDHKeySize=2048 -Djava.protocol.handler.pkgs=org.apache.catalina.webresources -classpath /usr/local/tomcat/bin/bootstrap.jar:/usr/local/tomcat/bin/tomcat-juli.jar -Dcatalina.base=/usr/local/tomcat -Dcatalina.home=/usr/local/tomcat -Djava.io.tmpdir=/usr/local/tomcat/temp org.apache.catalina.startup.Bootstrap start
root      17624   1452  0 17:31 pts/2    00:00:00 grep --color=auto tomcat


[root@node01 bin]# ss -lntup | grep 8080
tcp    LISTEN     0      100    [::]:8080               [::]:*                   users:(("java",pid=16744,fd=51))

步骤八:开发服务启动脚本

[root@node01 ~]# vim /usr/lib/systemd/system/tomcat.service
[Unit]
Description=Apache Tomcat
After=network.target remote-fs.target nss-lookup.target

[Service]
Type=forking
Environment=JAVA_HOME=/usr/java/jdk1.8.0_261-amd64
Environment=CATALINA_HOME=/usr/local/tomcat

ExecStart=/usr/local/tomcat/bin/startup.sh
ExecReload=/bin/kill -s HUP $MAINPID
ExecStop=/bin/kill -s QUIT $MAINPID
PrivateTmp=true

[Install]
WantedBy=multi-user.target

测试:

# 要重新加载,不然服务启动不起来
[root@node01 ~]# systemctl daemon-reload
[root@node01 ~]# systemctl restart tomcat.service
[root@node01 ~]# systemctl stop tomcat.service
[root@node01 ~]# ss -lntip | grep 8080
[root@node01 ~]#
[root@node01 ~]#
[root@node01 ~]# systemctl start tomcat
[root@node01 ~]#
[root@node01 ~]# ss -lntip | grep 8080
LISTEN     0      100       [::]:8080                  [::]:*                   users:(("java",pid=38501,fd=51))

[root@node01 ~]# /usr/local/tomcat/bin/shutdown.sh
Using CATALINA_BASE:   /usr/local/tomcat
Using CATALINA_HOME:   /usr/local/tomcat
Using CATALINA_TMPDIR: /usr/local/tomcat/temp
Using JRE_HOME:        /usr
Using CLASSPATH:       /usr/local/tomcat/bin/bootstrap.jar:/usr/local/tomcat/bin/tomcat-juli.jar
[root@node01 ~]# ss -lntpu | grep 8080
[root@node01 ~]#
[root@node01 ~]#
[root@node01 ~]# systemctl restart tomcat.service
[root@node01 ~]#
[root@node01 ~]#
[root@node01 ~]# ss -lntpu | grep 8080
tcp    LISTEN     0      100    [::]:8080               [::]:*                   users:(("java",pid=39970,fd=51))

步骤九:安装数据库,创建数据库并授权用户信息

# 重启数据库,之前的数据库干净环境
[root@node01 ~]# systemctl restart mysqld.service

# 不进入数据库创建数据库并指定字符集
[root@node01 ~]# mysql -uroot -p123456 -e 'create database jpress default character set utf8;'

# 授权用户
[root@node01 ~]# mysql -uroot -p123456 -e 'grant all on jpress.* to jpress@localhost identified by "123456";'

# 查看是否创建成功
[root@node01 ~]# mysql -uroot -p123456 -e 'show databases;'
mysql: [Warning] Using a password on the command line interface can be insecure.
+--------------------+
| Database           |
+--------------------+
| information_schema |
| jpress             |
| mysql              |
| performance_schema |
| sys                |
+--------------------+

步骤十:上传jpress至根路径,将其移动到/usr/local/tomcat/webapps下

[root@node01 ~]# ll
total 853964
-rw-------. 1 root root      1425 Mar 19 13:12 anaconda-ks.cfg
-rw-r--r--  1 root root   9433364 Apr 15 17:16 apache-tomcat-8.5.20.tar.gz
-rw-r--r--  1 root root 127431820 Apr 15 17:18 jdk-8u261-linux-x64.rpm
-rw-r--r--  1 root root  71018586 Apr 15 18:07 jpress-v4.2.0.war
-rw-r--r--  1 root root 666559924 Mar 19 21:19 mysql-5.7.36-linux-glibc2.12-x86_64.tar.gz


[root@node01 ~]# mv jpress-v4.2.0.war /usr/local/tomcat/webapps/

[root@node01 ~]# ll /usr/local/tomcat/webapps/
total 69360
drwxr-x--- 14 root root     4096 Apr 15 17:23 docs
drwxr-x---  6 root root       83 Apr 15 17:23 examples
drwxr-x---  5 root root       87 Apr 15 17:23 host-manager
drwxr-x---  6 root root       86 Apr 15 18:12 jpress-v4.2.0
-rw-r--r--  1 root root 71018586 Apr 15 18:07 jpress-v4.2.0.war
drwxr-x---  5 root root      103 Apr 15 17:23 manager
drwxr-x---  3 root root      306 Apr 15 17:23 ROOT

浏览器中输入:
http://IP:8080/jpress-v4.2.0/install

数据库信息:

后台信息:

步骤十一:安装完成后重启tomcat

# 安装完毕之后,重启tomcat即可访问。
systemctl restart tomcat

# 访问后台:http://IP:8080/jpress-v4.2.0/admin/login