Unity TheHeretic Gawain Demo 异教徒Demo技术学习
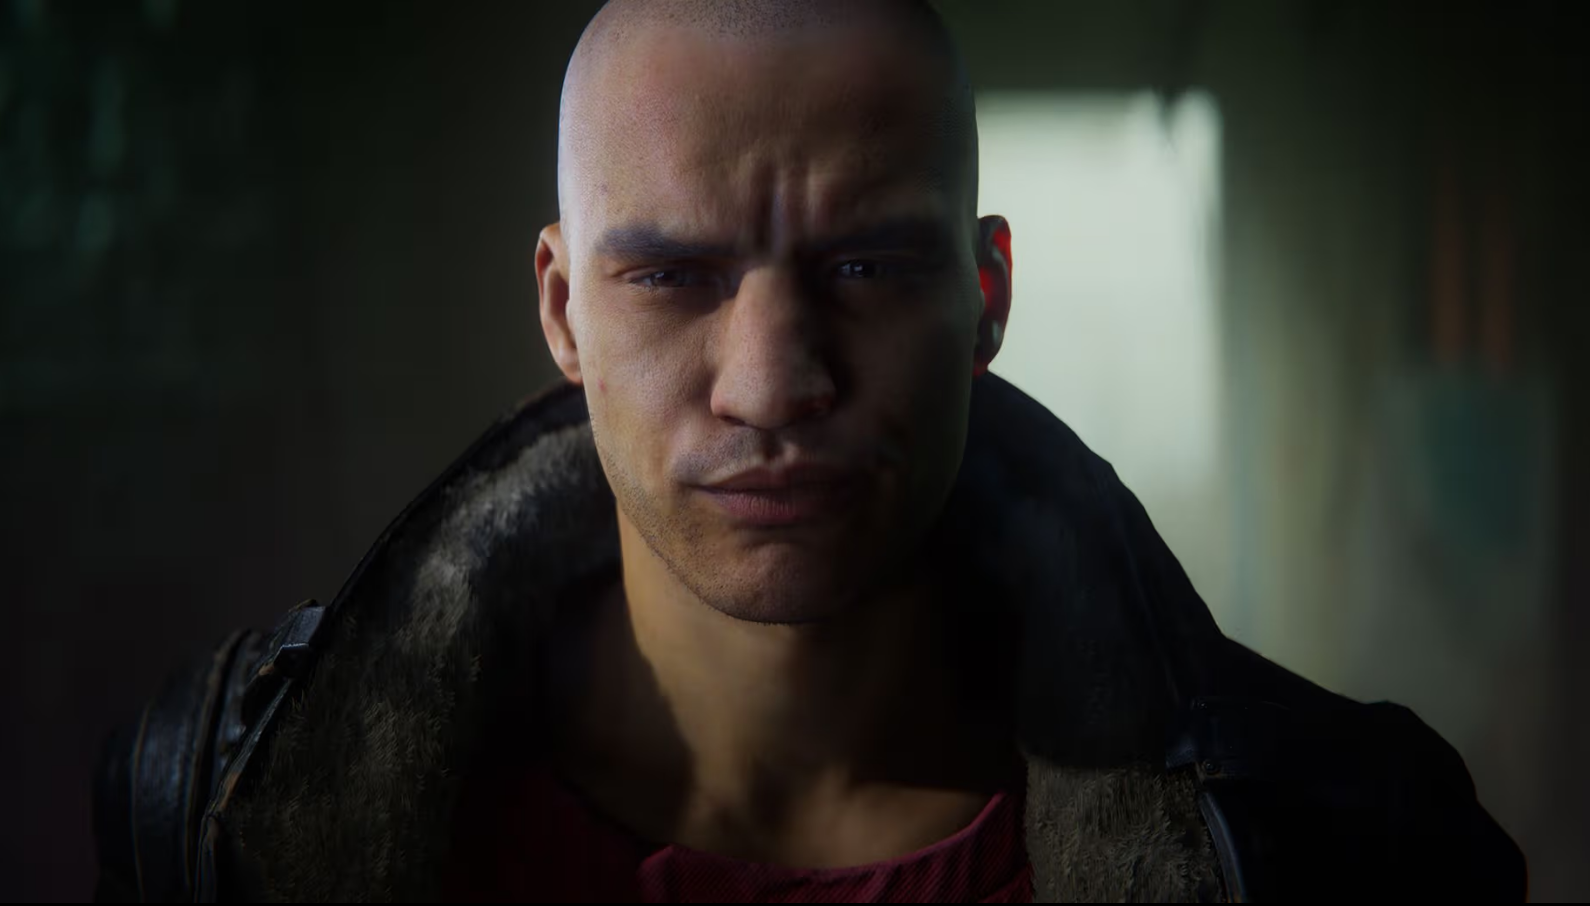
《异教徒 Heretic》是Unity在2019年GDC大会上展示的一款技术Demo,部分资源于2020年中旬公开下载。
这款Demo主要用于展示Unity在数字人技术领域的最新进展,尤其是在写实数字人渲染和面部动画的处理上。
通常面部肌肉的每一处细微变化都会对最终的视觉效果产生显著影响。
而传统基于表情基和骨骼驱动的面部动画方案,虽然能够提供较为流畅的表现,但在精度和真实感上往往存在差距。
为了追求更高的真实还原度,《异教徒》Demo采用了前沿的4D捕捉技术。这项技术通过硬件设备精确捕捉每一帧的面部表情数据,
并通过先进的拟合算法进行实时重建,从而实现了前所未有的细节还原和视觉真实感。
官方Blog:
https://unity.com/blog/technology/making-of-the-heretic-digital-human-character-gawain
百度网盘缓存Demo下载地址(测试所使用版本Unity2021.3.26,HDRP 12):
链接:
https://pan.baidu.com/s/1Mk3X8VZpeoQq-w5SfmsE2g
提取码: f75e
1.SkinDeformation
这部分主要处理4D设备捕捉到的表情动画,到Unity这个环节的数据应该是经过Wrap3D处理,
直接播放Demo场景里的Timeline即可单独预览:
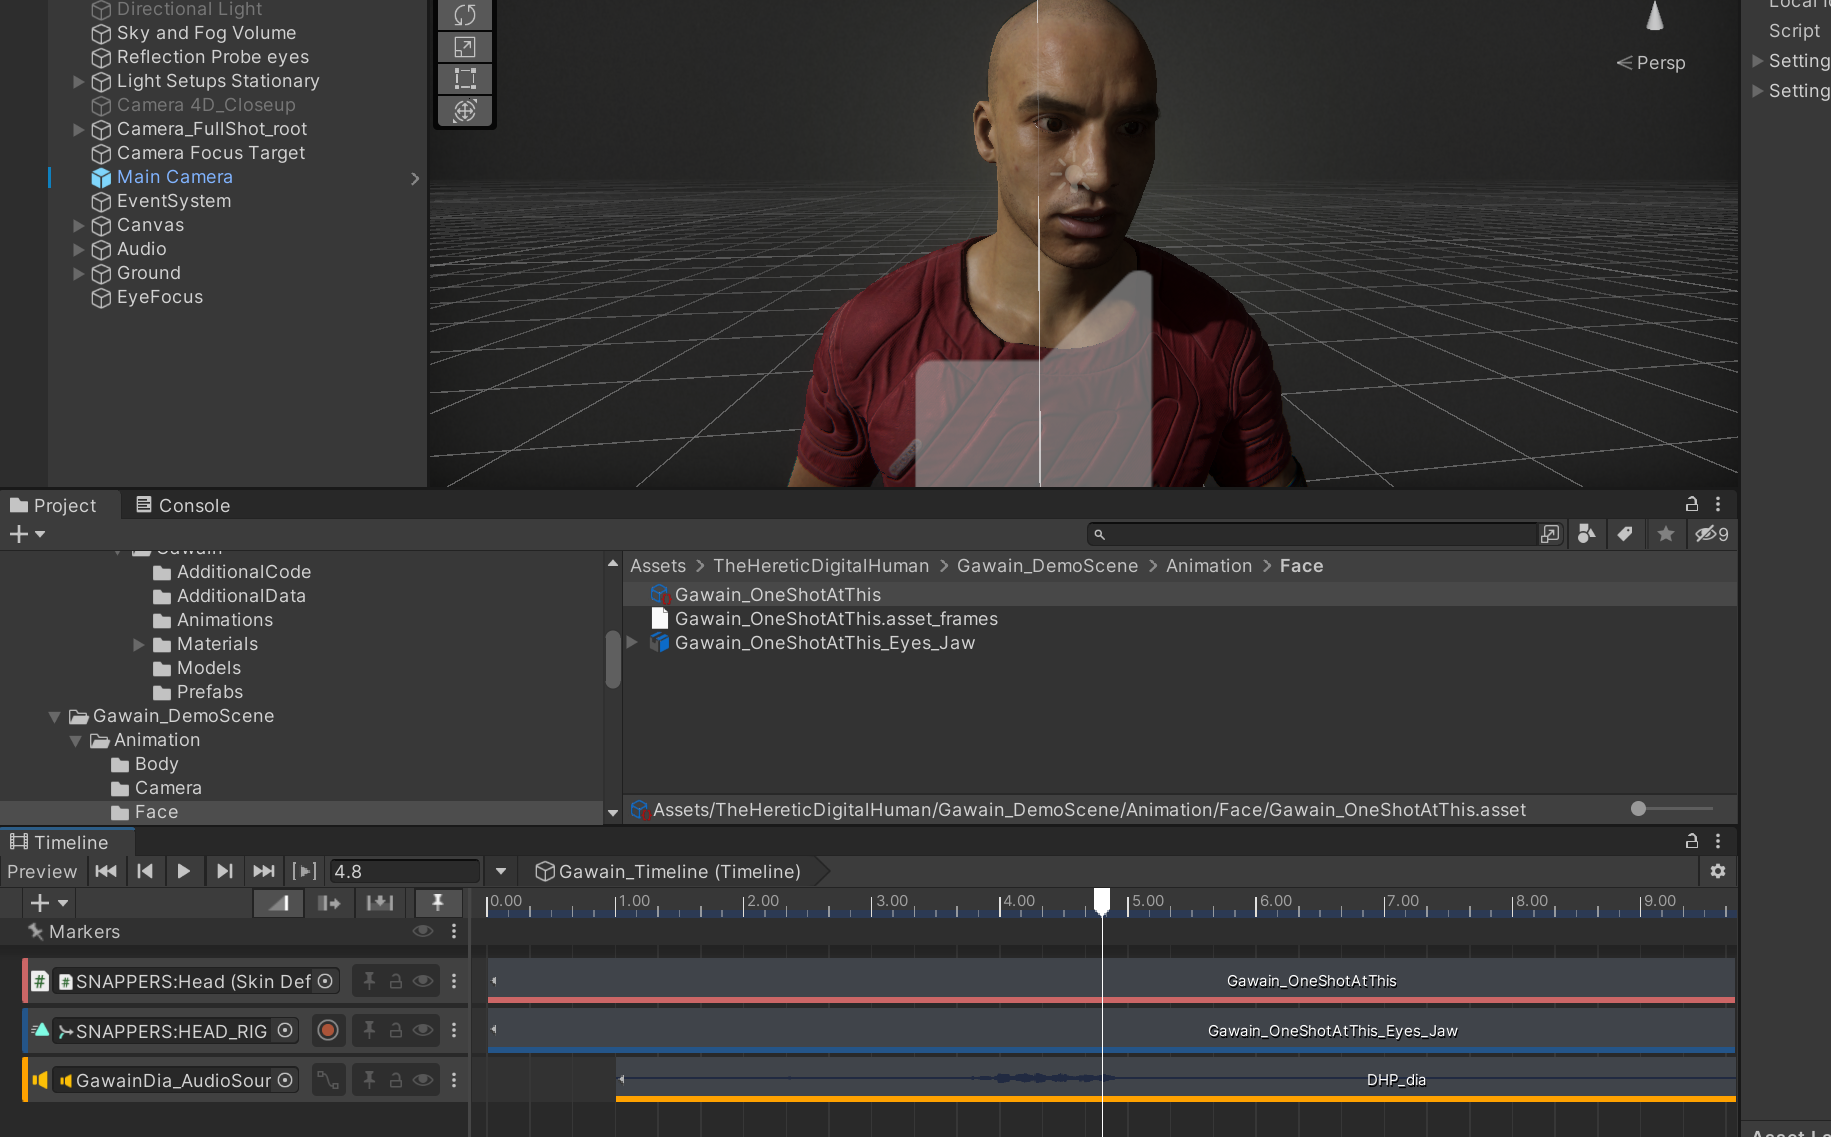
SkinDeformationClip是一个SO文件,存放烘焙好的动画信息,而SkinDeformationRenderer负责表情数据的最终渲染输出。
1.1 SkinDeformationRenderer
该脚本会读取blendInputs字段中的数据并拿来进行处理,该字段的赋值在SkinDeformationTimeline中:
var inputA =playable.GetInput(inputIndexA);var inputB =playable.GetInput(inputIndexB);var assetA = ((ScriptPlayable<SkinDeformationPlayable>)inputA).GetBehaviour().clip;var assetB = ((ScriptPlayable<SkinDeformationPlayable>)inputB).GetBehaviour().clip;//赋值处:
target.SetBlendInput(0, assetA, (float)(inputA.GetTime() /assetA.Duration), inputWeightA);

target.SetBlendInput(1, assetB, (float)(inputB.GetTime() / assetB.Duration), inputWeightB);
该脚本中的数据结构有标记Lo、Hi后缀字段,看上去似乎和低频高频数据有关,但实际上储存的是
当前帧和上一帧数据,以及插值数值。
for (int i = 0; i != subframeCount; i++)

{

    subframes[i].frameIndexLo=i;

    subframes[i].frameIndexHi= i + 1;

    subframes[i].fractionLo= 0.0f;

    subframes[i].fractionHi= 1.0f;

}
还有一组Albedo的有关数据,但没有看到被使用:
private static readonly BlendInputShaderPropertyIDs[] BlendInputShaderProperties ={newBlendInputShaderPropertyIDs()

    {

        _FrameAlbedoLo= Shader.PropertyToID("_BlendInput0_FrameAlbedoLo"),

        _FrameAlbedoHi= Shader.PropertyToID("_BlendInput0_FrameAlbedoHi"),

        _FrameFraction= Shader.PropertyToID("_BlendInput0_FrameFraction"),

        _ClipWeight= Shader.PropertyToID("_BlendInput0_ClipWeight"),

    },newBlendInputShaderPropertyIDs()

    {

        _FrameAlbedoLo= Shader.PropertyToID("_BlendInput1_FrameAlbedoLo"),

        _FrameAlbedoHi= Shader.PropertyToID("_BlendInput1_FrameAlbedoHi"),

        _FrameFraction= Shader.PropertyToID("_BlendInput1_FrameFraction"),

        _ClipWeight= Shader.PropertyToID("_BlendInput1_ClipWeight"),

    },

};
数据在导入时会通过MeshLaplacian进行降噪:
var laplacianResolve = (laplacianConstraintCount <frameVertexCount);if(laplacianResolve)

{#if SOLVE_FULL_LAPLACIANlaplacianTransform= newMeshLaplacianTransform(weldedAdjacency, laplacianConstraintIndices);#elselaplacianTransform= new MeshLaplacianTransformROI(weldedAdjacency, laplacianROIIndices, 0);

    {for (int i = 0; i != denoiseIndices.Length; i++)

            denoiseIndices[i]=laplacianTransform.internalFromExternal[denoiseIndices[i]];for (int i = 0; i != transplantIndices.Length; i++)

            transplantIndices[i]=laplacianTransform.internalFromExternal[transplantIndices[i]];

    }#endiflaplacianTransform.ComputeMeshLaplacian(meshLaplacianDenoised, meshBuffersReference);

    laplacianTransform.ComputeMeshLaplacian(meshLaplacianReference, meshBuffersReference);

}
在SkinDeformationClipEditor.cs中存放有ImportClip的逻辑。
当点击SO的Import按钮时触发。
1.2 SkinDeformationFitting
该脚本主要通过最小二乘得到拟合表情的各个BlendShape权重。
并通过Accord.NET子集得到非负数结果,这个在官方技术文章里有提到。
最小二乘后的计算结果会存放在frames.fittedWeights中:
//remap weights to shape indices
for (int j = 0; j != sharedJobData.numVariables; j++)

{

    sharedJobData.frames[k].fittedWeights[sharedJobData.blendShapeIndices[j]]= (float)x[j];

}
在运行时存放在:
public classSkinDeformationClip : ScriptableObject

{public unsafe structFrame

    {public float*deltaPositions;public float*deltaNormals;public float* fittedWeights;//<---
        publicTexture2D albedo;

    }
最后会传入Renderer:
public classSkinDeformationRenderer : MeshInstanceBehaviour

{

    [NonSerialized]public float[] fittedWeights = new float[0];//used externally
在Renderer中混合代码如下:
for (int i = 0; i != fittedWeights.Length; i++)

    smr.SetBlendShapeWeight(i,100.0f * (fittedWeights[i] * renderFittedWeightsScale));
补充:当最小二乘逻辑执行时,若当前矩阵与b矩阵数值相差过大,则结果越接近于0,反之矩阵之间数值越接近则结果数值越大。
在最小二乘法求解过程中,如果
当前矩阵
与
b矩阵
之间的数值差异较大,那么解的结果通常会趋近于零。
相反,
当前矩阵
与
b矩阵
的数值较为接近时,求解结果的数值则相对较大。
这一点也符合最终混合权重系数时的逻辑。
1.3 Frame信息读取
在Renderer脚本中,会调用clip.GetFrame获得当前帧的信息。即Clip中的
这样一个unsafe结构:
public classSkinDeformationClip : ScriptableObject

{public unsafe structFrame

    {public float*deltaPositions;public float*deltaNormals;public float*fittedWeights;publicTexture2D albedo;

    }
读取时会从frameData取得数据,该字段为NativeFrameStream类型,内部为Unity的异步文件读取实现。
加载时,如果是编辑器下就从对应目录的bin文件加载否则从StreamingAssets加载:
voidLoadFrameData()

{#if UNITY_EDITOR
    string filename = AssetDatabase.GetAssetPath(this) + "_frames.bin";#else
    string filename = Application.streamingAssetsPath +frameDataStreamingAssetsPath;

    Debug.Log("LoadFrameData" + filename + ")");#endif
2.SnappersHead
该脚本提供对控制器、BlendShape、Mask贴图强度信息的逻辑控制。
2.1 控制器
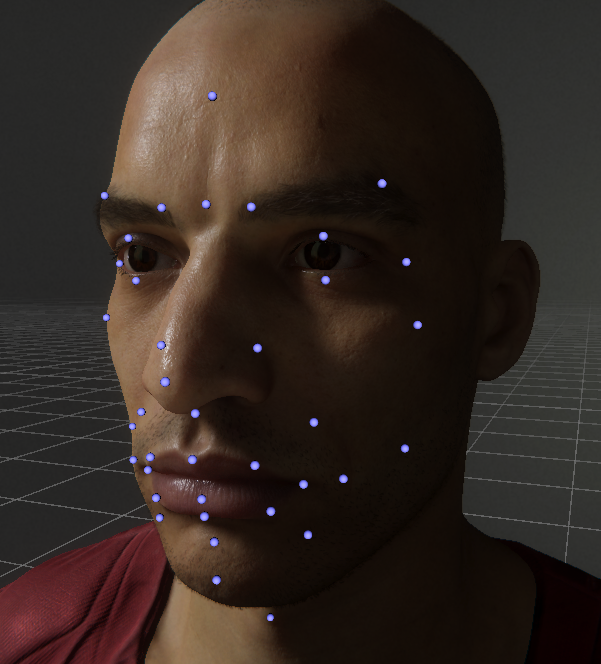
在场景中选中挂有SnappersHeadRenderer脚本的对象,即可在编辑器下预览控制器。
这里控制器只是GameObject,概念上的控制器。
它类似于DCC工具中的控制器导出的空对象,通过脚本获得数值,并在LateUpdate中输出到BlendShape从而起作用。
在层级面板位于Gawain_SnappersControllers/Controllers_Parent下,模板代码使用了136个控制器,
Gawain角色并没有使用所有控制器。
2.2 BlendShape & Mask贴图
SnappersHead脚本中主要是对之前SkinDeformation处理过的BlendShape进行钳制,
其代码应该是自动生成的:
public unsafe static void ResolveBlendShapes(float* a, float* b, float*c)

        {

            b[191] = max(0f, a[872] / 2.5f);

            b[192] = max(0f, a[870] / 2.5f);

            b[193] = max(0f, (0f - a[872]) / 2.5f);

            b[294] = linstep(0f, 0.2f, max(0f, (0f - a[871]) / 2.5f));

            b[295] = linstep(0.2f, 0.4f, max(0f, (0f - a[871]) / 2.5f));

            b[296] = linstep(0.4f, 0.6f, max(0f, (0f - a[871]) / 2.5f));

            b[297] = linstep(0.6f, 0.8f, max(0f, (0f - a[871]) / 2.5f));

            b[298] = linstep(0.8f, 1f, max(0f, (0f - a[871]) / 2.5f));

            b[129] = hermite(0f, 0f, 4f, -4f, max(0f, (0f - a[541]) / 2.5f));

            b[130] = max(0f, a[542] / 2.5f);

            b[127] = max(0f, (0f - a[542]) / 2.5f);

            b[34] = max(0f, (0f - a[301]) / 2.5f);

...
Mask贴图也是类似的方式,对Albedo、Normal、Cavity三中贴图进行后期优化与钳制,
最后将Mask混合强度信息传入Shader。
3.SkinAttachment粘附工具
这一块主要是眉毛等物件在蒙皮网格上的粘附。
与UE Groom装配的做法类似,通过三角形重心坐标反求回拉伸后的网格位置。
(UE Groom官方讲解:
https://www.bilibili.com/video/BV1k5411f7JD
)
SkinAttachment组件表示每个粘附物件,SkinAttachmentTarget组件表示所有粘附物件的父容器,
模型顶点和边信息查找用到了KDTree,在项目内的KdTree3.cs脚本中,
三角形重心坐标相关函数在Barycentric.cs脚本中。
查找时,每个独立Mesh块被定义为island,在这个结构之下再去做查找,
例如眉毛的islands如下:

通过Editor代码,每个挂载有SkinAttachment组件的面板上会重绘一份Target Inspector GUI,方便编辑。
当点击编辑器下Attach按钮时,会调用到SkinAttachment的Attach函数:
public void Attach(bool storePositionRotation = true)

{

    EnsureMeshInstance();if (targetActive != null)

        targetActive.RemoveSubject(this);


    targetActive=target;

    targetActive.AddSubject(this);if(storePositionRotation)

    {

        attachedLocalPosition=transform.localPosition;

        attachedLocalRotation=transform.localRotation;

    }


    attached= true;

}
SkinAttachmentTarget组件会在编辑器下保持执行,因此在更新到LateUpdate时候会触发如下逻辑:
voidLateUpdate()

{if(UpdateMeshBuffers())

    {

        ResolveSubjects();

    }

}
4.眼球
4.1 眼球结构
说一下几个关键性的结构:
- 角膜(cornea) 最外边的结构,位于房水之外,它的主要作用是屈光,帮助光线聚焦到眼内
- 房水(aqueoushumor)晶状体后的半球形水体,图形上经常要处理的眼球焦散、折射都是因为存在该结构的原因
- 虹膜(Iris)关键性的结构,位于晶状体外,房水内。眼睛颜色不同也是因为该结构的色素不一样导致,虹膜起到收缩瞳孔的效果
- 瞳孔(pupil)不多解释
- 巩膜(sclera)眼白部分,通常需要一张带血丝的眼白贴图
虽然房水这样的结构在多数图形相关文章中未被提起,但博主认为物理层面这仍很重要。
4.2 EyeRenderer
该Demo中的EyeRenderer实现了角膜、瞳孔、巩膜等效果的参数调节,后续这块内容被集成在HDRP的Eye Shader中,
并在Ememies Demo中得到再次升级。
4.3 眼球AO
使用ASG制作了眼球AO,ASG指AnisotropicSphericalGaussian各向异性球面高斯。
隐藏面部网格后,单独调节参数效果:
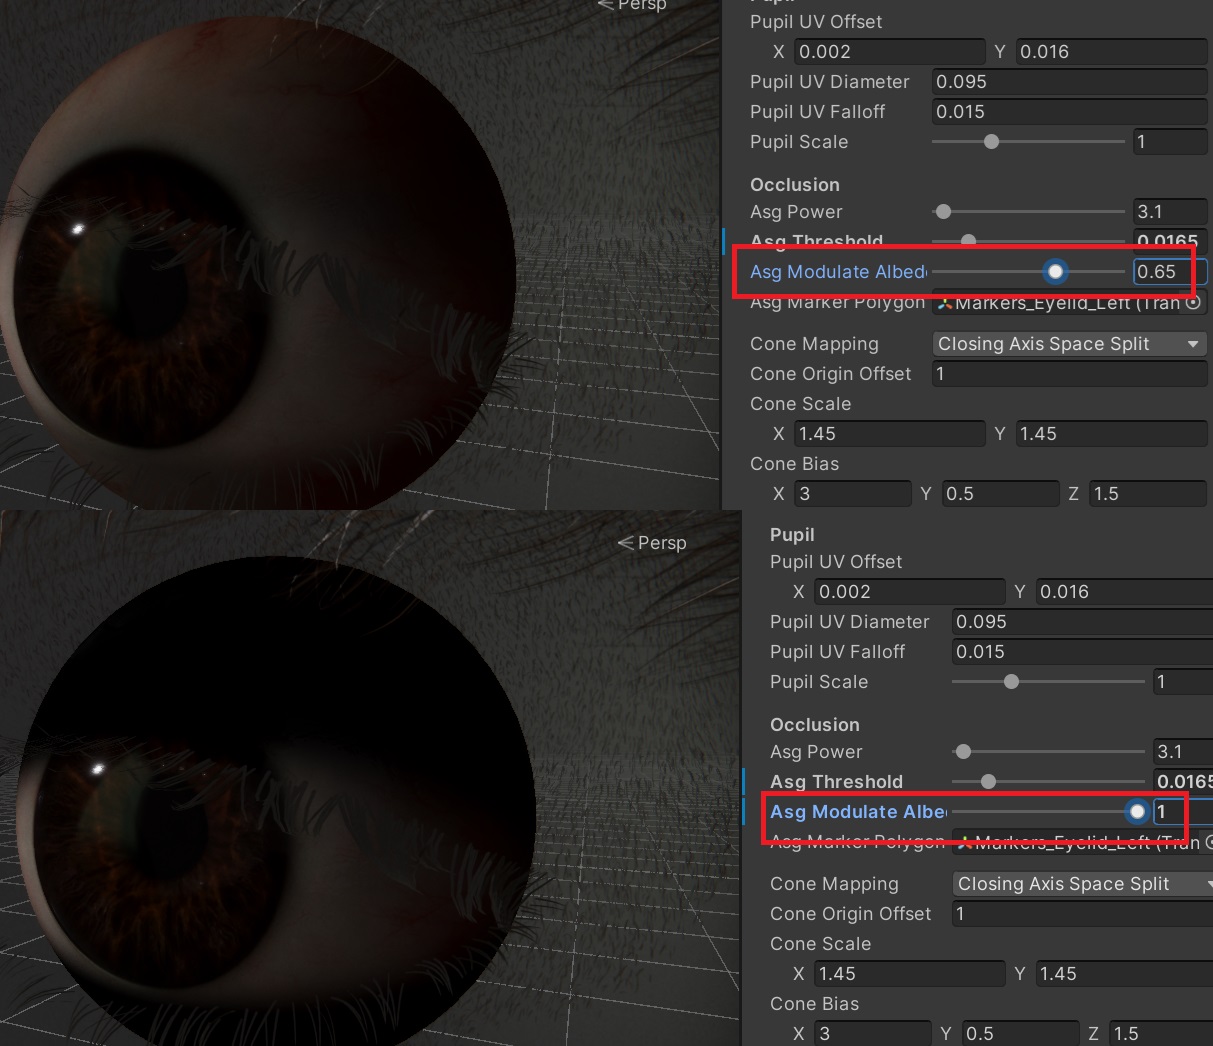
该技术类似球谐函数的其中一个波瓣,参数可自行微调。
将ASG单独提取测试效果:
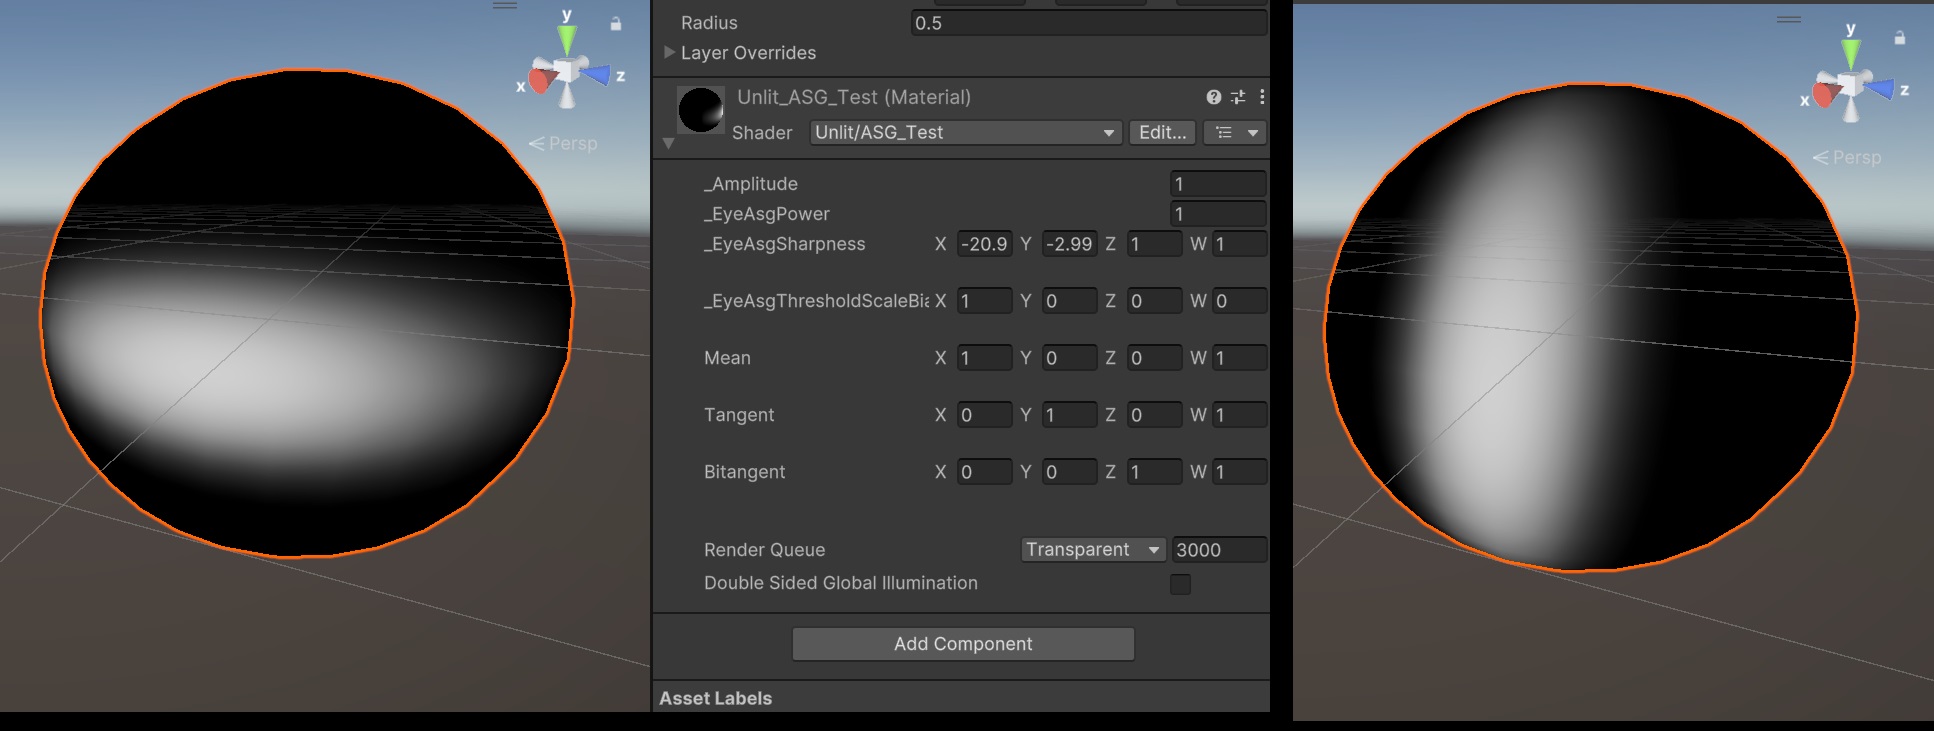
原代码中给到了2个该技术的参考链接:
structAnisotropicSphericalSuperGaussian

{//(Anisotropic) Higher-Order Gaussian Distribution aka (Anisotropic) Super-Gaussian Distribution extended to be evaluated across the unit sphere.//
    //Source for Super-Gaussian Distribution:// https://en.wikipedia.org/wiki/Gaussian_function#Higher-order_Gaussian_or_super-Gaussian_function//
    //Source for Anisotropic Spherical Gaussian Distribution:// http://www.jp.square-enix.com/info/library/pdf/Virtual%20Spherical%20Gaussian%20Lights%20for%20Real-Time%20Glossy%20Indirect%20Illumination%20(supplemental%20material).pdf//    floatamplitude;

    float2 sharpness;floatpower;

    float3 mean;

    float3 tangent;

    float3 bitangent;

};
5.Teeth&Jaw 颌骨
5.1 下颌骨位置修正
TeethJawDriver脚本提供了修改参数Jaw Forward,可单独对下颌位置进行微调,
隐藏了头部网格后非常明显(右侧参数为2):

另外该参数没有被动画驱动。
5.2 颌骨AO
颌骨AO(或者叫衰减更合理)通过外部围绕颌骨的6个点(随蒙皮绑定)代码计算得到。
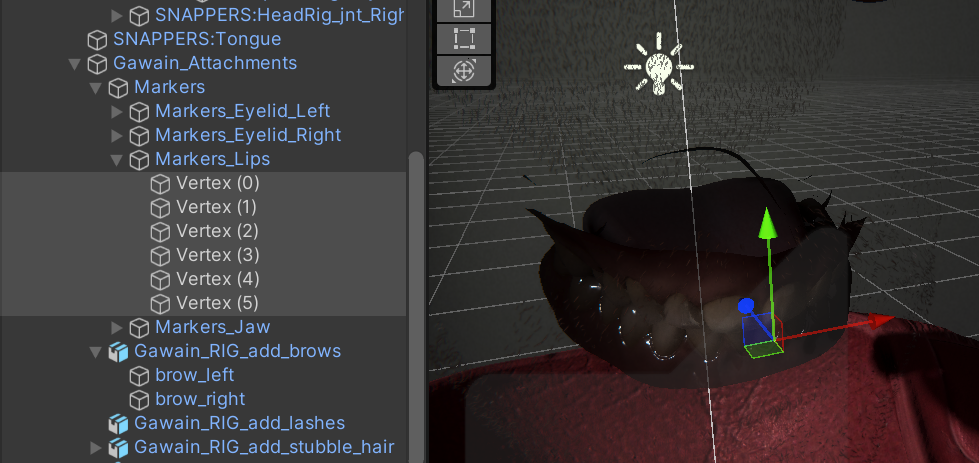
通过球面多边形技术实现,在SphericalPolygon.hlsl中可查看:
void SphericalPolygon_CalcInteriorAngles(in float3 P[SPHERICALPOLYGON_MAX_VERTS], out floatA[SPHERICALPOLYGON_MAX_VERTS])

{const int LAST_VERT = (SPHERICALPOLYGON_NUM_VERTS - 1);


    float3 N[SPHERICALPOLYGON_MAX_VERTS];//calc plane normals//where N[i] = normal of incident plane//eg. N[i+0] = cross(C, A);//N[i+1] = cross(A, B);
{

        N[0] = -normalize(cross(P[LAST_VERT], P[0]));for (int i = 1; i != SPHERICALPOLYGON_NUM_VERTS; i++)

        {

            N[i]= -normalize(cross(P[i - 1], P[i]));

        }

    }//calc interior angles
{for (int i = 0; i != LAST_VERT; i++)

        {

            A[i]= PI - sign(dot(N[i], P[i + 1])) * acos(clamp(dot(N[i], N[i + 1]), -1.0, 1.0));

        }

        A[LAST_VERT]= PI - sign(dot(N[LAST_VERT], P[0])) * acos(clamp(dot(N[LAST_VERT], N[0]), -1.0, 1.0));

    }

}
6.杂项
6.1 ArrayUtils.ResizeCheckedIfLessThan
项目中许多数组都使用了这个方法,该方法可确保目标缓存数组的长度不小于来源数组。
一方面避免使用List,另一方面可很好的做到缓存,避免预分配。
该类还提供了一个ArrayUtils.CopyChecked接口,可直接执行分配+拷贝。
6.2 头部骨架
头部使用FACS (Facial Action Coding System) 骨架结构进行搭建。
6.3 总结
在该Demo中,网格处理相对复杂,尤其是通过MeshAdjacency进行了顶点融合等操作。
这点在SkinAttachment粘附部分运用较多,时间原因不继续展开研究。
这些技术在Enemies Demo中得到了进一步升级。
项目中广泛使用了指针操作与Unity Job系统的结合,虽然不能确定仅仅使用指针就一定优于Unity.Mathematics,
但这一做法在性能优化上可能有所帮助。
可以预见,从传统的骨骼蒙皮技术,到更精细的面部肌肉拉伸蒙皮,再到利用机器学习实现的布料模拟,
角色渲染的提升方向至少已经有了明确的思路可循。在实时渲染领域,技术的不断进步为未来的渲染效果提供了新的可能性。
参考&扩展阅读:
官方Blog Heretic Demo页:
https://unity.com/blog/technology/making-of-the-heretic-digital-human-character-gawain
Megacity Unity Demo工程学习:
https://www.cnblogs.com/hont/p/18337785
Unity FPSSample Demo研究:
https://www.cnblogs.com/hont/p/18360437
Book of the Dead 死者之书Demo工程回顾与学习:
https://www.cnblogs.com/hont/p/15815167.html